Use these as your first test shot, then fine-tune after checking focus and star trails.
🌌 Want More Stargazing Tips?
Join 960+ astronomers. Weekly sky guides, no spam.
Quick Answer: DSLR Settings for Star Photography
To photograph stars with a DSLR, switch to manual mode (M), set your aperture to the widest your lens allows (f/2.8 or lower is ideal), set ISO to 1600–3200, and use a shutter speed of 15–25 seconds. Focus manually on a bright star using Live View at 10x magnification. Mount the camera on a sturdy tripod, use a remote shutter release or 2-second timer to avoid shake, and shoot in RAW format.
That is the complete recipe. The rest of this guide explains why each setting works, how to adjust for different targets (Milky Way, constellations, star trails), and how to avoid the mistakes that trip up every beginner on their first night out.
| Setting | Recommended Starting Point |
|---|---|
| Mode | Manual (M) |
| Aperture | Widest available (f/1.4–f/2.8 ideal; f/3.5–f/4 workable) |
| ISO | 1600–3200 (adjust based on light pollution and noise) |
| Shutter Speed | 15–25 seconds (use the 500 Rule for your focal length) |
| Focus | Manual — Live View at 10x on a bright star |
| White Balance | Daylight or ~4500K (fine-tune in post if shooting RAW) |
| File Format | RAW (not JPEG) |
| Drive Mode | Single shot or intervalometer for sequences |
| Image Stabilization | OFF (when on a tripod) |
| Long Exposure Noise Reduction | OFF (slows workflow; do dark-frame subtraction in post instead) |
What You Need (Essential Gear)
You do not need expensive equipment to photograph stars. An entry-level DSLR, a kit lens, and a tripod are enough to capture the Milky Way on your first clear night. Here is what matters and what does not.
Must-have gear
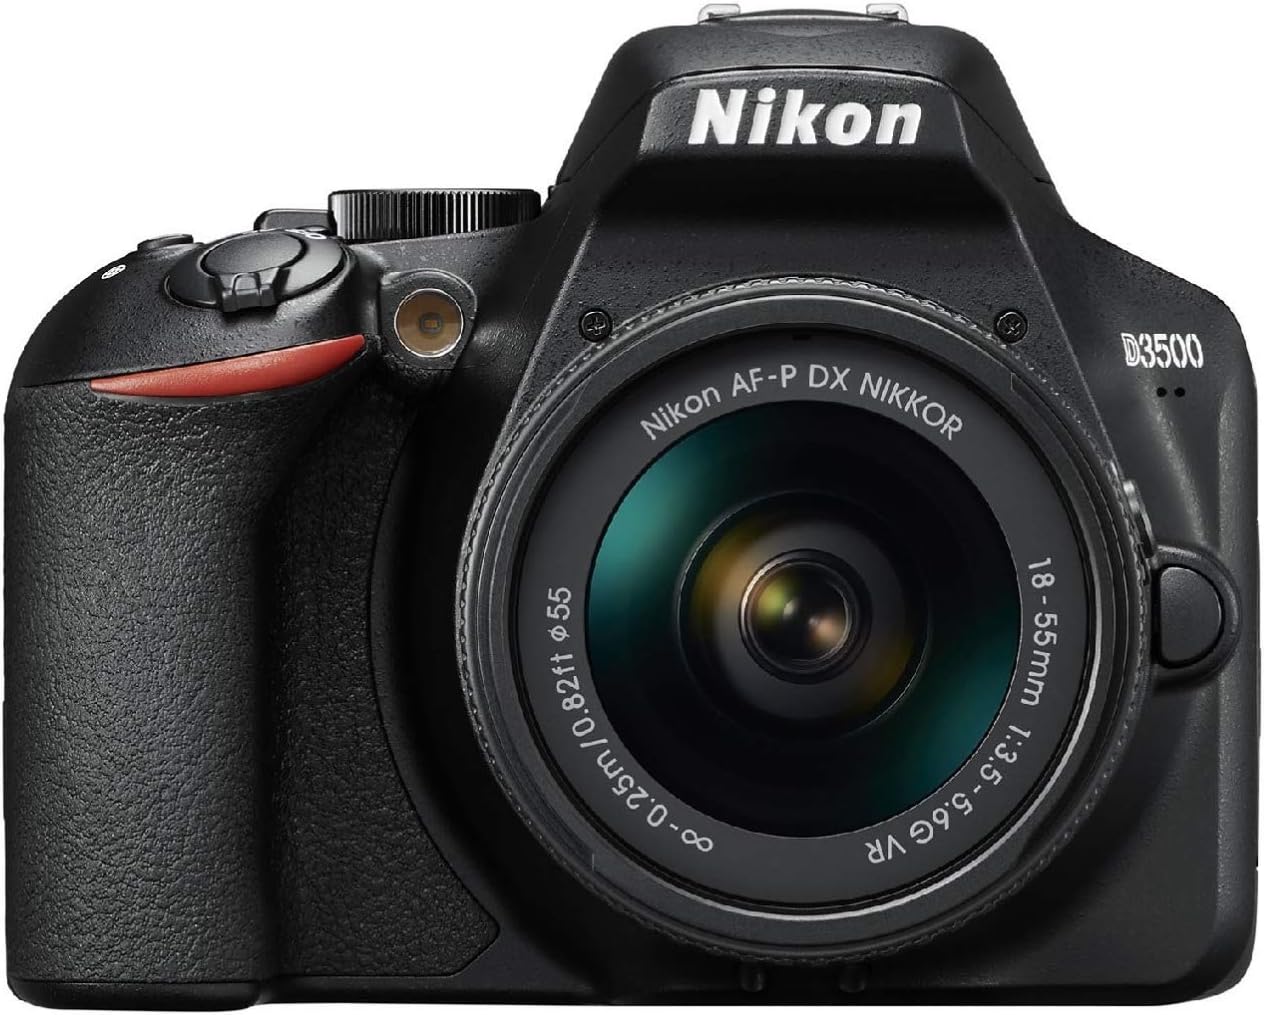
A DSLR (or mirrorless) camera with manual controls. Any camera that lets you independently set shutter speed, aperture, and ISO works. Popular beginner models include the Canon EOS Rebel T7/T8i, Nikon D3500/D5600, and Sony a6000/a6400. If you already own a DSLR, use it — do not wait for a "better" camera to start.
A wide-angle lens with a fast aperture. The wider the lens, the more sky you capture. The faster the aperture (lower f-number), the more light it gathers per second. Ideal specs are 14–24mm at f/2.8 or faster on a full-frame camera (10–18mm on a crop sensor). However, the 18–55mm kit lens that came with your camera still works — just use it at its widest setting (18mm) and widest aperture (typically f/3.5). You will get good results; they just will not be quite as clean as a dedicated fast lens.
A sturdy tripod. This is the single most important accessory. You are exposing for 15–25 seconds, and any vibration — even from wind or soft ground — will turn stars into smudges. Do not use a cheap, wobbly tripod from a big-box store. A solid aluminum or carbon fiber tripod in the $60–$150 range will serve you for years. If it is windy, hang your camera bag from the tripod's center hook for extra stability.
Nice-to-have gear
A remote shutter release or intervalometer. Pressing the shutter button by hand introduces camera shake. A wired or wireless remote ($10–$25) eliminates this completely. If you do not have one, use your camera's built-in 2-second or 10-second delay timer — it works fine.
A red-light headlamp. White light kills your night vision (it takes 20–30 minutes to fully adapt to the dark). A headlamp with a red mode lets you see your camera controls and navigate your gear without blinding yourself. Cost: $10–$20.
Extra batteries. Long exposures and cold nights drain batteries fast. Bring at least one spare, and keep it warm in your pocket until you need it.
A star-finding app. Free apps like Stellarium, SkySafari, or Sky Map show you exactly where the Milky Way, constellations, and deep-sky objects are positioned at any given time and location. They are essential for planning your shoot.
What you do NOT need (yet)
You do not need a telescope, a star tracker, a dedicated astronomy camera, or any filters to get started. All of those come later as you develop your skills. This guide is about what you can do tonight with the gear you already own.
Related: DSLR Astrophotography on a Budget: Beginner's Guide | Best Camera for Astrophotography
Camera Settings Explained
Star photography requires you to override everything your camera wants to do automatically. Auto mode, autofocus, auto ISO, and auto white balance all fail in the dark. Here is what to set and why.
Mode: Manual (M)
Switch your camera's mode dial to M (manual). This gives you independent control over aperture, shutter speed, and ISO — the three variables that determine your exposure. In auto or semi-auto modes, the camera's metering system gets confused by a nearly black scene and produces wildly inconsistent results.
Aperture: As wide as your lens allows
Set your aperture to the lowest f-number your lens supports. On a dedicated fast lens, that is f/1.4, f/1.8, or f/2.8. On a typical kit lens (18–55mm f/3.5–5.6), that is f/3.5 at 18mm.
Why? A wider aperture means more light hits the sensor per second. In a dark scene where every photon counts, the difference between f/2.8 and f/4 is significant — f/2.8 gathers roughly twice as much light as f/4 in the same exposure time. This lets you keep ISO lower (less noise) or shutter speed shorter (sharper stars).
One trade-off: most lenses are slightly softer at their widest aperture, and star points near the edges of the frame can show coma (a comet-like distortion). If you notice this, stopping down by one-third of a stop (e.g., from f/1.8 to f/2.0) usually cleans it up without losing much light.
ISO: 1600–3200 as a starting point
ISO controls how sensitive the sensor is to light. Higher ISO = brighter image, but also more digital noise (grain). For star photography on a tripod without tracking, ISO 1600 is a safe starting point for most modern cameras. If the image looks too dark on the back of the camera, bump up to ISO 3200. If you are shooting from a truly dark sky site with no light pollution, you may be able to use ISO 800–1600 and still get a bright exposure.
Avoid going above ISO 6400 unless your camera handles high-ISO noise exceptionally well (full-frame sensors are generally better at this than crop sensors). Noise can be reduced in post-processing, but a severely noisy image is hard to recover.
Quick test trick: Temporarily crank ISO to 12800 or 25600, take a 3–5 second test shot, and check composition and focus. This saves you from waiting through multiple 25-second exposures just to confirm you are pointed in the right direction. Once everything looks good, dial ISO back down to your target setting and take the real exposure.
Shutter speed: 15–25 seconds (use the 500 Rule)
This is the setting that requires the most thought. Stars appear to move across the sky because the Earth is rotating. If your shutter is open too long, stars stretch into short lines (trails) instead of staying as crisp points.
The general rule of thumb: 15–25 seconds works for wide-angle lenses (14–24mm on full frame). The exact maximum depends on your focal length, which is where the 500 Rule comes in (see the next section).
White balance: Daylight (~5200K) or 4500K
If you are shooting in RAW (and you should be), white balance does not permanently affect the image — you can change it freely in post-processing. Set it to Daylight or manually to ~4500K so the image looks reasonable on the back of the camera for judging focus and composition. Avoid "Auto" white balance, which tends to overcorrect and give a greenish or magenta cast that makes it harder to evaluate your shots in the field.
File format: RAW (not JPEG)
Shoot in RAW. Always. RAW files capture the full data from the sensor, giving you massive flexibility to adjust exposure, white balance, shadows, highlights, and noise reduction in editing software. A JPEG is a compressed, processed file that bakes in the camera's choices — once detail is lost, it is gone for good. The Milky Way often looks faint and washed out on the camera's LCD screen, but a RAW file contains far more hidden detail that you can bring out in Lightroom, Photoshop, or the free alternatives like RawTherapee and darktable.
Turn OFF these features
- Image stabilization / vibration reduction — When the camera is on a tripod, stabilization systems can actually introduce micro-vibrations as the system hunts for movement that is not there. Turn it off.
- Long exposure noise reduction — This feature takes a second "dark frame" exposure of equal length after every shot, which means a 20-second exposure takes 40 seconds total. It halves your shooting speed. Instead, take separate dark frames at the end of your session and subtract them in stacking software like DeepSkyStacker or Sequator. This is more efficient and produces the same result.
- Auto ISO — You need full control. Lock ISO to a fixed value.
Related: How to Do Astrophotography (Start-to-Finish Guide) | Best Nikon Camera for Astrophotography
The 500 Rule (and Why It Matters)
The 500 Rule is a simple formula that tells you the longest shutter speed you can use before stars start to show visible trailing:
500 ÷ focal length = maximum shutter speed in seconds
For example:
- 18mm lens → 500 ÷ 18 = ~28 seconds
- 24mm lens → 500 ÷ 24 = ~21 seconds
- 35mm lens → 500 ÷ 35 = ~14 seconds
- 50mm lens → 500 ÷ 50 = ~10 seconds
If you are using a crop-sensor camera (APS-C), multiply your focal length by your camera's crop factor first (1.5 for Nikon/Sony, 1.6 for Canon), then divide 500 by that number:
- 18mm lens on Canon APS-C → 18 × 1.6 = 28.8 → 500 ÷ 28.8 = ~17 seconds
- 18mm lens on Nikon APS-C → 18 × 1.5 = 27 → 500 ÷ 27 = ~18 seconds
Quick reference: 500 Rule by focal length
| Focal Length | Full Frame | APS-C (1.5x) | APS-C (1.6x) |
|---|---|---|---|
| 14mm | 36s | 24s | 22s |
| 18mm | 28s | 19s | 17s |
| 24mm | 21s | 14s | 13s |
| 35mm | 14s | 10s | 9s |
| 50mm | 10s | 7s | 6s |
Is the 500 Rule still accurate?
The 500 Rule was designed in the era of 35mm film and lower-resolution digital sensors. On modern high-resolution cameras (30+ megapixels), the rule can be slightly too generous — if you zoom in to 100% on the image, you may see very short star trails even within the rule's recommended time.
For sharper results on high-resolution sensors, some photographers use the 400 Rule (replace 500 with 400) or the more precise NPF Rule, which factors in pixel pitch and aperture. The NPF Rule is built into the PhotoPills app ("Spot Stars" mode), which makes it easy to calculate in the field.
For beginners, the 500 Rule is an excellent starting point. Take a test shot at the recommended shutter speed, zoom in on the LCD screen, and shorten the exposure by 2–3 seconds if you see any elongation. You will dial in your personal sweet spot quickly.
How to Focus on Stars at Night
Focusing is the single biggest frustration for beginners. Autofocus simply does not work on stars — there is not enough contrast for the system to lock on. You must focus manually, and the technique is straightforward once you know the trick.
The Live View method (recommended)
- Switch your lens to manual focus (MF). On most lenses, this is a physical switch on the lens barrel.
- Turn on Live View (the mode that shows the scene on the rear LCD screen instead of the viewfinder).
- Point the camera at the brightest star you can find — Sirius, Vega, Arcturus, or any planet works. If no bright stars are visible yet, a distant light on the horizon (at least 1 km away) also works.
- Use your camera's magnification button to zoom in to 5x or 10x on the Live View screen. The star will appear as a small blob.
- Slowly turn the focus ring until the star shrinks to the smallest, tightest possible point. Go back and forth a few times to make sure you have hit the sharpest spot.
- Lock focus. Some photographers wrap a small piece of gaffer tape around the focus ring to prevent accidental bumps. At minimum, do not touch the focus ring for the rest of the session.
The infinity focus myth
Many lenses have an infinity mark (∞) on the focus ring, and it is tempting to just twist the ring to that mark. On modern autofocus lenses, the infinity mark is often approximate — the true infinity focus point may be slightly before or after the mark. Always verify with Live View rather than trusting the mark.
Take a test shot and check
After you think you have nailed focus, take a single exposure at your planned settings. Review the image on the LCD, zoom in to 100%, and examine the stars. If they look like soft blobs rather than tight dots, refine your focus and shoot again. This five-minute investment saves you from discovering an entire night's worth of photos are slightly out of focus.
Step-by-Step Field Checklist
This is the practical, do-it-in-order workflow for your night out. Print it, screenshot it, or save it to your phone.
Before you leave home
- Charge batteries (camera + headlamp). Pack spares.
- Clear your memory card. Format it in-camera for best reliability.
- Check the weather. Clear skies are non-negotiable. Use Clear Outside, weather.gov, or a similar app.
- Check the Moon phase. A bright Moon washes out faint stars and the Milky Way. The best nights for star photography are within 5 days on either side of a New Moon. Use a Moon phase calendar or a stargazing app.
- Scout your location. Use a light-pollution map (lightpollutionmap.info or the Dark Sky Map app) to find a site with minimal light pollution — Bortle Class 4 or darker is ideal. Even Bortle 5–6 (suburban) skies can produce impressive results, though.
- Plan your targets. Open Stellarium or SkySafari and check where the Milky Way core, major constellations, or any specific target will be positioned at your planned shooting time.
At the location
- Set up your tripod on firm, level ground. Extend the legs fully. Do not extend the center column unless necessary — it reduces stability.
- Mount your camera. Make sure the quick-release plate is locked tight.
- Dial in your settings:
- Mode: M (manual)
- Aperture: widest available (lowest f-number)
- ISO: 1600 (starting point)
- Shutter speed: use the 500 Rule for your focal length
- White balance: Daylight or 4500K
- Image format: RAW
- Image stabilization: OFF
- Long exposure noise reduction: OFF
- Focus manually using the Live View method described above. Lock the focus ring.
- Compose your shot. Include an interesting foreground element (a tree, rock, building, mountain silhouette) to give the image depth and a sense of scale. Stars alone can feel flat; a strong foreground makes the image.
- Take a test shot at high ISO (12800+) for 3–5 seconds to check composition and focus quickly.
- Take the real exposure at your target settings. Review, zoom in, check stars for sharpness and trails.
- Adjust and iterate. If the image is too dark, increase ISO by one stop (e.g., 1600 → 3200) or lengthen shutter speed by a few seconds. If stars are trailing, shorten the exposure. If the image looks orange from light pollution, adjust white balance in post (or try ~3800K in-camera).
- Shoot multiple frames. Take 10–20 identical exposures of the same composition. You can later "stack" these frames in free software like Sequator (Windows) or Starry Landscape Stacker (Mac) to dramatically reduce noise and reveal more detail than any single frame can show.
Before you pack up
- Take 10–15 dark frames. Put the lens cap on, keep all settings identical, and take exposures with the cap on. These "dark frames" capture sensor noise patterns and are subtracted during stacking to produce a cleaner final image.
- Take a few flat frames (optional for advanced processing). Hold a white t-shirt or LED tracing pad over the lens and take a short exposure so the frame is evenly lit to about 50% brightness. Flats correct for vignetting and dust spots.
Settings for Specific Targets
Different night-sky subjects require slightly different approaches. Here is a quick reference.
Milky Way core
The Milky Way's bright center (the galactic core) is the most popular astrophotography target. It is visible in the Northern Hemisphere from roughly late February through October, with the core highest in the sky during June–August. In the Southern Hemisphere, it is visible for a larger portion of the year.
| Setting | Recommendation |
|---|---|
| Lens | 14–24mm (the wider the better) |
| Aperture | f/1.4–f/2.8 |
| ISO | 1600–3200 |
| Shutter speed | 15–25s (500 Rule) |
| Focus | Manual on bright star, Live View 10x |
| Tip | Include a foreground element. Compose with the core slightly off-center. |
Constellation portraits
Photographing a specific constellation (Orion, Scorpius, the Big Dipper) requires a slightly narrower field of view to fill the frame with the constellation's stars.
| Setting | Recommendation |
|---|---|
| Lens | 24–50mm |
| Aperture | f/2.8–f/4 |
| ISO | 800–1600 |
| Shutter speed | 8–15s (500 Rule; shorter because of longer focal length) |
| Focus | Manual on the brightest star in the constellation |
| Tip | Lower ISO works here because constellation stars are bright. Shorter exposures keep them pin-sharp. |
Star trails
Star trail images show the arcs of star movement across the sky over a long period — typically 30 minutes to several hours. The technique is different: instead of one long exposure, you take many consecutive short exposures and blend them in software.
| Setting | Recommendation |
|---|---|
| Lens | 14–24mm (or any focal length — longer = tighter arcs) |
| Aperture | f/2.8–f/4 |
| ISO | 400–800 |
| Shutter speed | 30 seconds per frame, continuously for 30–120+ minutes |
| Focus | Manual — same as always |
| Tip | Use an intervalometer to fire continuous 30-second exposures with 1-second gaps. Stack in free software like StarStaX. Point toward Polaris (North Star) for circular trails, or toward the celestial equator for straight arcs. |
The Moon (bonus)
The Moon is bright — so bright that the settings you use for stars will massively overexpose it. Lunar photography uses completely different exposure values.
| Setting | Recommendation |
|---|---|
| Lens | 200mm+ (the longer the better for detail) |
| Aperture | f/8–f/11 |
| ISO | 100–400 |
| Shutter speed | 1/125s–1/250s |
| Focus | Manual or autofocus (the Moon is bright enough for AF) |
| Tip | Use the "Looney 11 Rule": at f/11, shutter speed ≈ 1/ISO. At ISO 100, that is f/11 at 1/100s. |
Related: Can You Take a Picture With Your Phone Through a Telescope? | Beginner Astrophotography Targets
Common Mistakes and How to Fix Them
Every beginner makes the same handful of errors on their first few nights out. Here is what to watch for.
Stars are short lines instead of dots
Cause: Shutter speed too long for your focal length. Fix: Shorten the exposure. Recalculate using the 500 Rule. If you are on a crop sensor, remember to multiply your focal length by the crop factor before dividing.
Entire image is blurry
Cause: Camera shake (you pressed the shutter by hand, the tripod moved, or wind shook the setup). Fix: Use a remote shutter release, the camera's self-timer (2-second delay), or a smartphone app that triggers the shutter wirelessly. Tighten all tripod joints. Hang a weight from the center column hook in windy conditions.
Stars are out of focus (soft blobs)
Cause: You trusted the lens's infinity mark, bumped the focus ring, or did not verify focus on the LCD. Fix: Refocus using the Live View method. Take a test shot, zoom to 100%, and verify. Tape the focus ring in place once you are happy.
Image is too dark — no stars visible
Cause: ISO too low, aperture too narrow, or shutter speed too short. Fix: Increase ISO to 3200 or 6400. Make sure the aperture is at its widest. Ensure shutter speed matches the 500 Rule. If stars are still invisible, you may have significant light pollution — drive to a darker location.
Image looks orange or washed out
Cause: Light pollution from nearby cities, street lights, or a bright Moon. Fix: Adjust white balance toward a cooler setting (3800–4200K) to reduce the orange cast. In post-processing, use the white balance slider and dehaze/clarity tools. For the best results, shoot from a darker location — even a 30-minute drive away from a city center makes a dramatic difference. A light-pollution filter (like the Optolong L-Pro or NiSi Natural Night) can also help.
Image is noisy (grainy)
Cause: ISO too high, or you are underexposed and trying to brighten in post. Fix: Lower ISO if possible. Expose correctly in-camera (slightly overexpose rather than underexpose — it is easier to darken a bright image than to brighten a dark one without adding noise). Stack multiple exposures: 15–20 stacked frames reduce noise dramatically compared to a single frame.
Related: How to Get Into Astrophotography | Best Telescope Mounts for Astrophotography
Next Steps: From Tripod to Star Tracker
Once you have mastered tripod-based star photography, the natural next step is a star tracker — a small motorized mount that compensates for Earth's rotation, allowing much longer exposures (2–5 minutes instead of 15–25 seconds). Longer exposures at lower ISO produce dramatically cleaner, more detailed images.
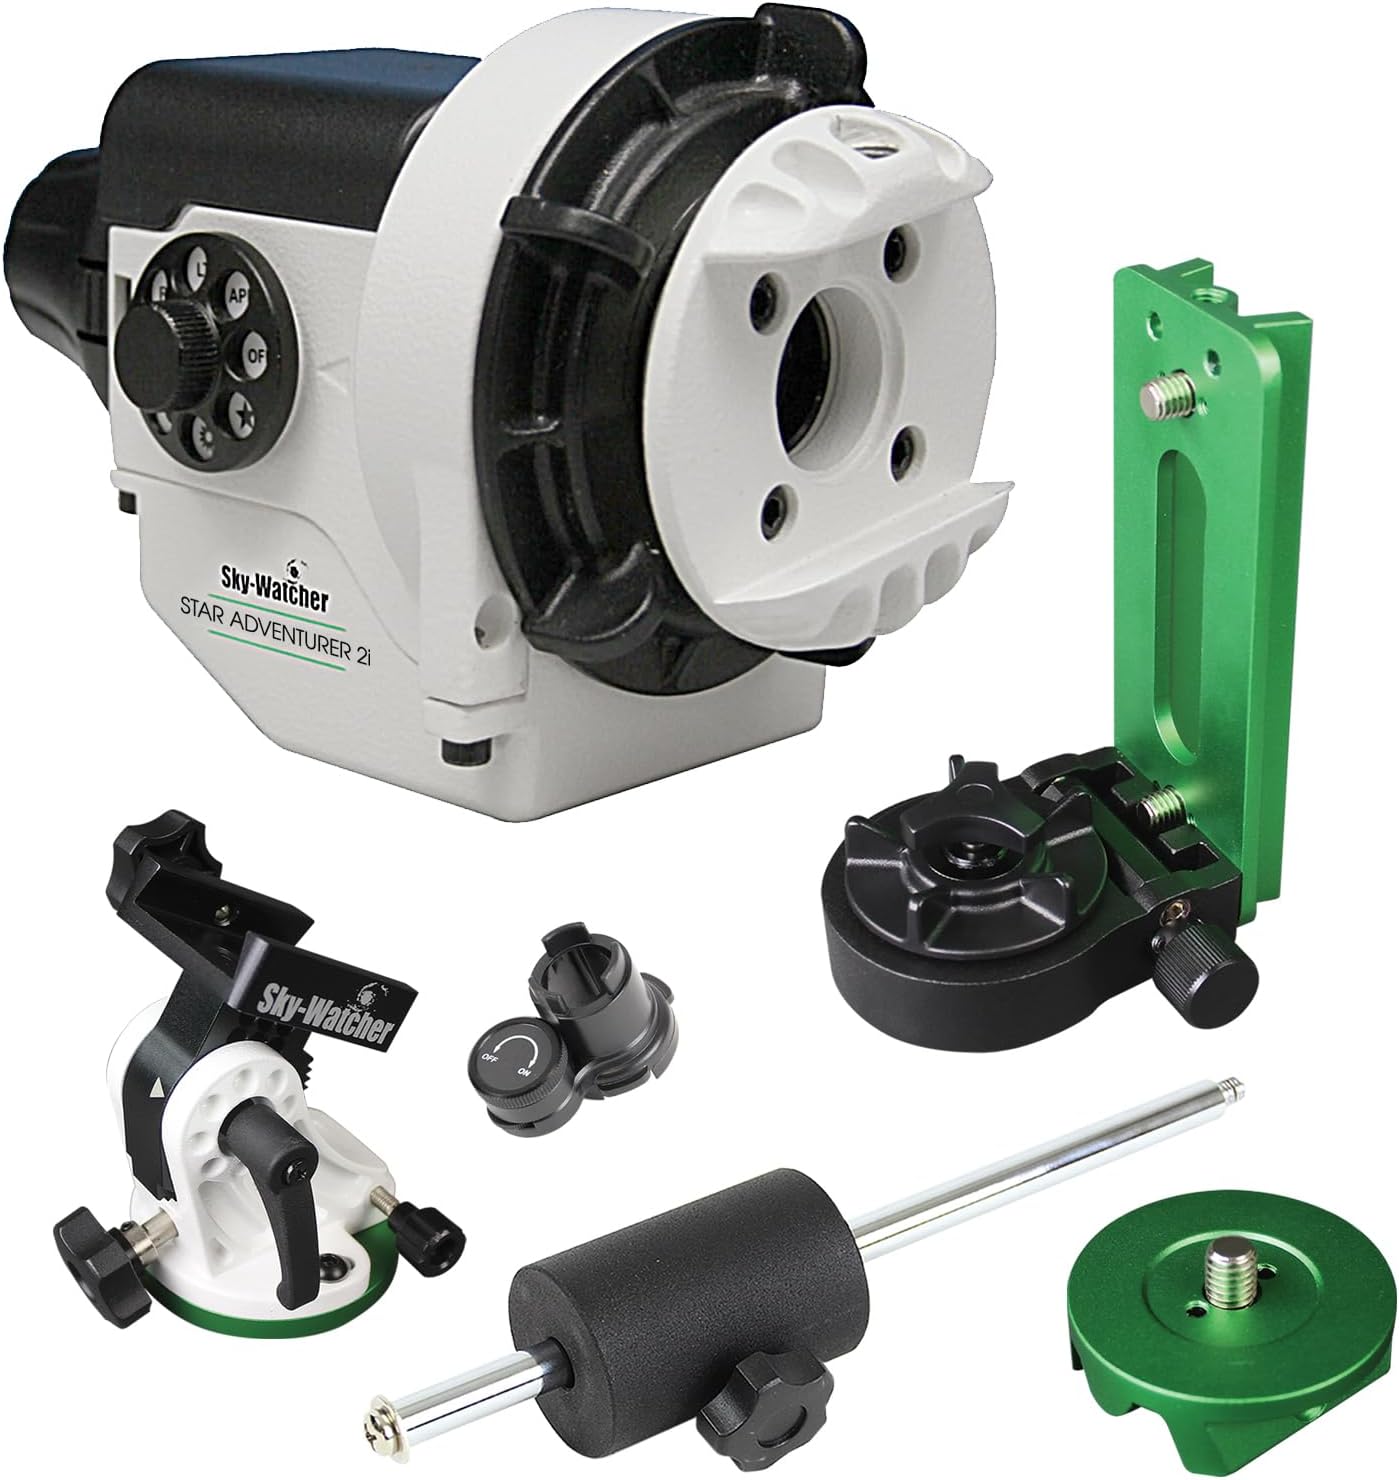
A star tracker like the Sky-Watcher Star Adventurer 2i (~$400) or the iOptron SkyGuider Pro (~$450) sits between your tripod and camera. You polar-align it to the North Star (a 2-minute process once you learn it), turn on the motor, and the tracker slowly rotates your camera at the same speed the sky moves. The result: pinpoint stars in exposures of 60, 120, or even 180 seconds.
With a star tracker, you can also start using longer focal length lenses (50mm, 85mm, 135mm) to zoom in on individual deep-sky objects like the Orion Nebula, Andromeda Galaxy, and the Pleiades star cluster. This is where DSLR astrophotography starts to overlap with telescope-based imaging — and where the hobby truly opens up.
The next upgrade path looks like this:
- Tripod + wide lens (where you are now) — Milky Way panoramas, constellation portraits, star trails
- Star tracker + camera lens — cleaner Milky Way, first deep-sky objects (M42, M31, Pleiades)
- Star tracker + small telescope — deeper into nebulae and galaxies with more detail and resolution
- Equatorial mount + dedicated telescope — serious deep-sky astrophotography with long focal lengths and cooled cameras
You do not need to plan all four steps right now. Step 1 alone will keep you busy and excited for months.
Related: DSLR Astrophotography on a Budget (Under $800) | Best Telescopes for Astrophotography
FAQs
What DSLR settings should I use to photograph stars?
Set your DSLR to manual mode (M), aperture to the widest your lens allows (f/2.8 or lower is ideal), ISO to 1600–3200, and shutter speed to 15–25 seconds based on your focal length and the 500 Rule. Focus manually using Live View at 10x magnification on a bright star. Shoot in RAW format, turn off image stabilization, and use a remote shutter release or 2-second timer to avoid camera shake.
Do I need an expensive camera to photograph stars?
No. Any DSLR or mirrorless camera with full manual controls can photograph stars. Entry-level models like the Canon Rebel T7, Nikon D3500, or Sony a6000 all produce impressive night-sky images. The tripod and lens matter at least as much as the camera body. A $150 used DSLR on a solid tripod will outperform a $2,000 camera held by hand.
What is the 500 Rule in astrophotography?
The 500 Rule is a formula for calculating the maximum shutter speed before stars start to trail: 500 ÷ focal length = maximum shutter speed in seconds. On a crop-sensor camera, multiply the focal length by the crop factor first (1.5x for Nikon/Sony APS-C, 1.6x for Canon APS-C). For example, an 18mm lens on a Canon crop sensor: 18 × 1.6 = 28.8, then 500 ÷ 28.8 ≈ 17 seconds. On high-resolution cameras (30+ megapixels), the 400 Rule or NPF Rule (available in the PhotoPills app) gives more precise results.
How do I focus on stars with a DSLR?
Switch your lens to manual focus, enable Live View on the LCD screen, point the camera at the brightest star or planet visible, and zoom in to 10x magnification. Slowly turn the focus ring until the star appears as the smallest, sharpest point possible. Take a test shot, review at 100% zoom, and refine if needed. Once sharp, do not touch the focus ring — tape it in place to prevent accidental bumps.
Can I photograph the Milky Way with a kit lens?
Yes. An 18–55mm kit lens at 18mm and f/3.5 can photograph the Milky Way. You will need to use a higher ISO (3200–6400) to compensate for the narrower aperture, which means more noise — but stacking 10–20 identical frames in free software like Sequator or Starry Landscape Stacker dramatically reduces that noise. A dedicated wide-angle fast lens (14mm f/2.8, for example) produces cleaner single frames, but a kit lens can absolutely get you started tonight.
Why are my star photos blurry?
The three most common causes of blurry star photos are: camera shake (pressing the shutter button by hand, a wobbly tripod, or wind), incorrect focus (autofocus failure or trusting the lens infinity mark instead of verifying in Live View), and too-long shutter speed (stars trailing because the exposure exceeded the 500 Rule limit for your focal length). Fix shake with a remote release and solid tripod. Fix focus with the Live View method. Fix trails by shortening the exposure.
What is the best lens for star photography?
For wide-field Milky Way shots, a 14–24mm lens at f/2.8 is the standard recommendation. Popular options include the Rokinon/Samyang 14mm f/2.8 (~$250–$350, manual focus only, excellent value), the Sigma 14mm f/1.8 Art (~$1,200, best-in-class), and the Tokina 11–20mm f/2.8 for APS-C cameras (~$450). If budget is tight, the kit 18–55mm lens you already own is a legitimate starting point — do not let lens envy prevent you from shooting.
Do I need a telescope to photograph stars?
No. A DSLR with a wide-angle lens on a tripod is all you need for Milky Way photography, constellation portraits, and star trails. A telescope becomes useful when you want to photograph individual deep-sky objects (nebulae, galaxies, star clusters) at high magnification. Even then, many astrophotographers use camera lenses on star trackers — not telescopes — for stunning deep-sky results with 50–200mm lenses.
What apps help with planning a star photography session?
Stellarium (free, desktop and mobile) shows you exactly what the sky looks like at any time and location. PhotoPills ($10, iOS/Android) includes the 500 Rule calculator, NPF Rule calculator, Milky Way planner, and augmented-reality sky view. Clear Outside (free) provides detailed cloud-cover forecasts optimized for astronomers. Light Pollution Map (lightpollutionmap.info, free) shows Bortle scale ratings so you can find dark-sky sites near you.
Start Shooting Tonight
Star photography with a DSLR is one of the most accessible and rewarding branches of astrophotography. You do not need a telescope, a tracking mount, or a professional camera. You need a DSLR with manual controls, a sturdy tripod, a dark sky, and the willingness to experiment for an hour under the stars.
Set manual mode. Open the aperture wide. ISO 1600. Shutter speed from the 500 Rule. Focus on a bright star in Live View. Press the shutter. That is all five steps. The rest is practice, iteration, and the addictive thrill of watching the Milky Way appear on the back of your camera screen for the first time.
Once you are hooked — and you will be — come back for the next steps: star trackers, telescope astrophotography, and deep-sky imaging techniques.
Subscribe to our free weekly newsletter → — 960+ astronomers get stargazing tips, gear reviews, and cosmic event alerts every week.
You may also like:
- DSLR Astrophotography on a Budget: Beginner's Guide
- How to Do Astrophotography (Start-to-Finish Guide)
- How to Get Into Astrophotography
- Best Camera for Astrophotography (Buying Guide)
- Best Nikon Camera for Astrophotography
- Best Telescope Mounts for Astrophotography
- Best Telescopes for Astrophotography in 2026
- Beginner Astrophotography Targets
- Can You Take a Picture With Your Phone Through a Telescope?
- Stargazing 101: An Introductory Guide