✅ Key Takeaways
- The SV105 is an ultra-budget planetary camera (~$30) with a 2MP CMOS sensor and USB 2.0 connectivity
- Image quality is limited: suitable only for the Moon and bright planets like Jupiter and Saturn
- Good entry point to learn stacking workflows before upgrading to the SV305 or ZWO ASI cameras
- Requires third-party software (SharpCap, FireCapture) since Svbony's bundled software is basic and outdated
🌌 Get Weekly Stargazing Tips
Join 900+ astronomers. No spam, just sky.
SVBONY is a Chinese brand manufacturing optical instruments for astronomy and hunting. They are famous for selling affordable equipment for telescopes on Amazon and eBay, and they have a lineup of astronomy cameras SV105, SV205, and SV305.
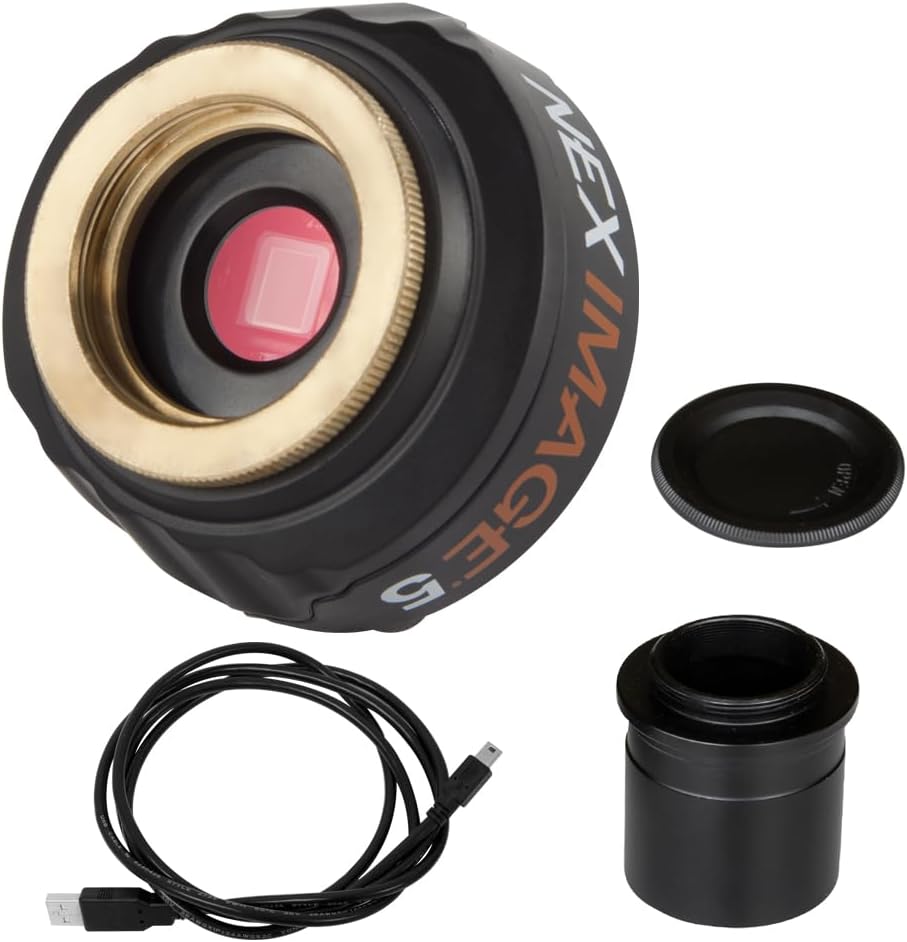
SVBONY SV105 is the cheapest entry-level planetary camera on the market. The primary use for planetary cameras is capturing videos of the Moon and Planets in our solar system. You can buy this camera for less than $70. It is affordable for astronomy beginners to try some planetary and moon imaging.
For a long time, the cheapest option to do planetary imaging was using modified webcams with the telescope. I also wrote an article on how to use a webcam with a telescope. But manufacturers are building cameras that are the same price as webcams and without the need for modifications.
It is good because now you can just order the camera and use it out of the box. SVBONY SV105 is a 2M pixel 1080p webcam in a nice sturdy case ready for use for astronomy.
In this article, we will take a closer look at SVBONY SV105 planetary camera, including its specifications and optical performance.
Specifications of the SVBONY SV105 astronomy camera
The most important specification for a planetary camera is the resolution and frames per second (FPS).
When you are trying to capture an image of the planet, you need to record a video at the highest FPS possible and then process it in the astronomy software to create a nice picture.
SVBONY SV105 camera is capable of doing a high speed of 30 FPS in 1080p. It is adequate for the camera in this price range.
Here are the full specifications of the SVBONY SV105 telescope camera:
| Image Sensor | 1/3” COMS color sensor |
| Image Resolution | 2M pixels (1920*1080) |
| USB Type | USB2.0 |
| Pixel Size | 3μm X 3μm |
| Shutter | Electronic rolling shutter |
| Exposure Time | 15ms-500ms |
| Maximum Frame Rate | 30 FPS (1920*1080) |
| ADC | 10 bits |
| Interface Type | Standard UVC protocol |
| Cable Length | 1.8m |
| Weight | 100g |
| Supported Operating System | Windows 7, 8, 10 |
| Supported Telescope | A telescope set with 1.25” diagonal |
| Power Consumption | 150MA@5V |
| Working Humidity | 30%-80% |
| Storage Humidity | 20%-90% |
| Operating Temperature | 0°C to +50°C |
| Storage Temperature | -10°C to +60°C |
SVBONY SV105’s optical performance
There are some image outputs you’ll consider not good enough if you are using an expensive planetary and lunar imaging camera. The SVBONY SV105 isn’t one, so I can cut it some slack.
In good conditions, it produced clean images with natural colors, more so during daylight than at night. Note that your telescope will play some part in the quality of the images, so my experience may differ from yours.
Learning about the best timing for different objects also helps. For example, you’ll get crispier pictures of some objects around the first light (dawn) during specific periods of the year.
While testing, I found that the images had reverse vignetting. Reverse vignetting is when the edges of your image have some glow or a slightly different hue from the rest of the photo.
You can reduce the reverse vignette using flat-field correction while editing the image.
Another major stumbling block to SVBONY SV105’s optical performance is that it only outputs videos in motion JPEG (MJPG), not RAW.
Motion JPEG by itself has some inherent compression, which means there’s an additional limitation to the limitation of the sensor that comes with the ‘ 105.’ You have more flexibility with manipulating and editing RAW files than MJPG files.
Another observation when I captured the moon was that it looked way overexposed. Initially, I tried different settings on the software to no avail. The only remedy was to use a moon filter.
The SVBONY SV105 is a bit light-sensitive, more than a webcam, and I’ve had some friends confirm this.
Overall, it’s adequate for beginners interested in lunar and planetary imaging.
🔭 Want our top telescope picks for 2026?
Join 960+ astronomers getting weekly gear reviews, deals, and stargazing tips. Free.
How to use the SVBONY SV105 camera
Here is how to use the SVBONY SV105 camera
- Install Sharpcap on your computer with the installation CD included in the SV105 package.
- Put the CD into your laptop and follow the prompts to complete the installation. You can use other software like AstroDMx Capture if you please.
- Connect the SV105 to your laptop through the USB cord provided in the package. It auto-installs the needed driver.
- Launch Sharpcap as an administrator.
- Click on the “Camera” button. You should see “SVBONY SV105” as an option. Double-click it to complete the connection. You should also see the image from the camera on your computer screen now.
You may need to focus the telescope using an eyepiece before attaching the SV105. If the image is fuzzy, you may need to use a cleaning cloth to remove dust and moisture from the camera.
If you cannot see any image, visit “Device Manager” on your PC and check if SVBONY SV105 is listed there. If it is, then the connection was successful. If not, you may need to download the driver from SVBONY’s website.
You could also be getting an error because you did not use the USB cord that came with the package.
Is the SVBONY SV105 camera easy to use for a beginner?
The SVBONY SV105 is easy to use for a beginner because it doesn’t require any elaborate setup. It can be best described as plug-and-play.
Once you’ve installed SharpCap on your computer, connect the camera to your PC, and you’re ready to start lunar and planetary imaging.
Do you need to download drivers for the SVBONY SV105 camera?
SVBONY SV105 is a standard UVC device, and there is no need to download the drivers manually. After you connect the camera to your computer, windows will recognize it and automatically download the required drivers.
It will work with Windows 7, 8, and 10 without issues. But remember to use only the cable provided in the box.
And this applies to any astronomy camera: don’t use any USB hubs or USB extension cables because you may encounter connection issues and even speed issues and transfer stability.
Always connect your camera directly to your USB slot with the provided cable.
SVBONY SV105 camera uses USB2.0 type, so make sure you have at least USB2.0 available. Of course, it will also work in USB 3.0 and USB 3.1 slots.
Necessary software for SVBONY SV105 Camera
SharpCap is one of the best astronomy-capturing software, and it is free. You can use this CD to install the software, but I recommend downloading the latest version on sharpcap.co.uk.
It is not enough to have the camera connected and all drivers installed. You have to control it with dedicated astronomy software. Don’t use your standard webcam software.
The SVBONY SV105 will come with the SharpCap installation CD. If you encounter any problems with the latest version, then install the version of SharpCap provided on the CD that came in the box.
Can I use the SVBONY SV105 camera for astrophotography and deep sky imaging?
SVBONY SV105 is exclusively a planetary camera. You can do only planetary and moon imaging with it, which is a part of astrophotography. Deep sky astrophotography is not possible with this camera.
Common cameras for astrophotography are standard DSLR cameras. Maybe you have one at home, so if you are interested in deep-sky astrophotography, check my article about Astrophotography With DSLR (Beginners Guide).
Understanding maximum exposure
To be able to capture nebulae or galaxies, the camera needs to be capable of doing long exposure shots of at least a minimum of 30s. The maximum exposure of SVBONY SV105 is only 500ms, so it is impossible to do deep sky astrophotography.
Astronomy cameras are always made for a specific purpose. So we have planetary cameras with high FPS and cameras for deep sky imaging capable of doing long exposures.
How to capture the best images
SharpCap is very important because it will allow you to control all the features of the camera. You will have to do some learning here, but it is easy.
After a few sessions, you will get a sense of what you need to adjust and change to get the best picture, including changing the resolution. You can also get full resolution with the camera in MJPG mode, but only if you’re down at 15.6ms.
It is important to adjust the exposure time, color saturation, and FPS. All will depend on the seeing conditions and the object you are trying to capture.
For example, the Moon is a very bright object, so you will have to lower exposure time compared to planets. You can always ask on SharpCap forums for help or try to watch some guides on YouTube to learn how to control it.
Is the SVBONY SV105 a good guide camera?
So, if you can’t use this camera for deep sky astrophotography, can you use it as a guide camera? Well, no, and yes, it depends.
The guiding camera is a secondary camera used in astrophotography that is attached to a guide scope on top of the primary telescope to help the motorized mount track the object during very long exposures.
The major feature of the guiding camera is light sensitivity. The SV105 is not very sensitive. You must see the stars through it to use the guiding software. The guiding scope you are using is important because if it is big enough, it can provide enough light for the SV105 camera sensor to work as a guiding camera.
Some people successfully use SVBONY SV105 as a guiding camera, but it is not an ideal solution. It’s a different story with a dedicated guiding camera.
I recommend the discussion in the Cloudynights forum thread about this camera.
Is it worth investing in the SVBONY SV105 camera?
As the first camera for beginners diving into planetary imaging, it is definitely worth it. But as a proper planetary camera, it is not. Planetary imaging has a steep learning curve and you will learn a lot even with this cheap camera.
However, after you master the SharpCap and processing software to create decent photos, you can start looking into more expensive planetary cameras from .
They are making astonishing cameras for astronomy. But I always recommend starting with basic and cheaper equipment and seeing if this hobby is for you or not.
Remember, it is a very expensive hobby and you can learn a lot even with a cheap SVBONY SV105 telescope camera.
Takeaway: SVBONY SV105 is a budget camera for affordable planetary imaging
There are many reasons to like the SVBONY SV105 planetary imaging camera. I like that it’s easy to use and set up. The images were also of considerable quality despite the meager price point.
Its limitations are quite obvious but not surprising. It does the job and meets expectations. That’s more than enough for someone testing the waters of planetary imaging.
Don’t forget to subscribe to our newsletter where you’ll find the latest cosmic discoveries, expert stargazing tips, and exclusive subscriber deals. Embark on your cosmic journey if you haven’t already!
Read also: