- Alignment is everything - A proper 2-3 star alignment makes the GoTo system accurate all night.
- Level your tripod first - An unlevel base throws off all tracking and GoTo accuracy.
- Start with bright alignment stars - Pick well-known stars the system suggests for best calibration.
- Use the hand controller's database - Thousands of objects at your fingertips; just select and slew.
🌌 Want More Stargazing Tips?
Join 900+ astronomers. Weekly sky guides, no spam.
So, you are in front of your first stargazing session with your new AZ GoTo computerized telescope. The marketing materials tell us that the computerized telescopes are easy to use; however, there is a learning curve to getting used to operating this type of scope.
Once you master all the setup and alignment, finding and observing any object in the night sky will be very easy.
Pay attention because setting up the GoTo computerized telescope is a crucial part. You need the perfect star alignment to enjoy the telescope, and most people find it hard and frustrating.
The process may look complicated at first, but if you follow my advice here, you will struggle less with it. And after a few sessions, the setup and star alignment will become just a short routine before a long night full of breathtaking views of the night sky.
In this article, I will talk about the Alt-Azimuth(AZ) Synscan GoTo system used by Sky-Watcher, but it applies to all computerized systems used by other telescope manufacturers. The Equatorial(EQ) computerized mount has different steps for the star alignment. I will go in-depth about EQ star alignment in a separate article.
Let’s start!

1. Leveling The Tripod
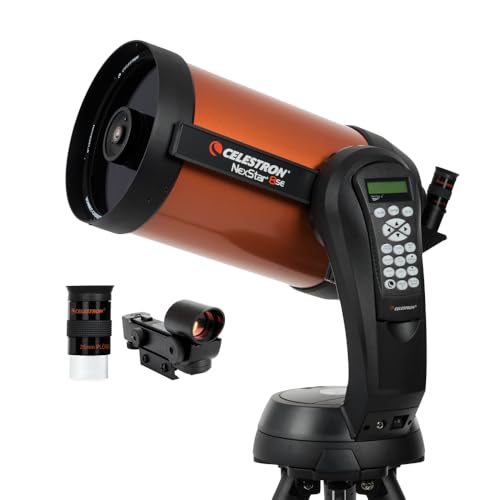
All computerized telescopes come in a few different parts: the Optical Tube Assembly, the computerized mount, and the tripod. Don’t put everything together before you start. The first thing you need to do is to take a tripod and find a sturdy place where you want to have your telescope for the stargazing session.
Try to use a concrete base and not grass. Putting it on the grass can sink in under the load and mess up your level and alignment of the telescope.
Many people build it on the porch or the balcony which is ok. But you have to keep in mind that a sturdy and stable base for the telescope is very important. If you have boards on your porch, they can be moving and vibrating the telescope while you are walking around. Anyway, if you want to use it on the grass because you have no other option or you are at some remote place, put at least some tiles or plates under the legs.
Every computerized telescope comes with a built-in level on the tripod. From my personal experience, tripods are usually not well made and not calibrated. So if you try to level the tripod based on these built-in levels, you might have a problem with tracking, and you won’t be able to find any object in the sky.
Buy a cheap level from your local hardware store because it will definitely do a better job. Level the tripod by adjusting the length of the legs. Always check the level in all three directions above each leg. When you are sure that it is leveled, fasten the screws on the legs and you are done.
You can also hang something heavy on the middle of the tripod like bottles filled with water/sand or some other load to get more stability and move the center of gravity closer to the ground.
2. Prepare The Telescope Before The Alignment
Now when the tripod is leveled, and stable, take the mount and carefully screw it on the top. The next part is to mount the telescope on the mount. Computerized mounts come with a small battery bag so you can power your telescope when you are out. However, I don’t recommend using it.
Maybe just for very short sessions when you don’t have other options, but it is always better to use a proper power adapter or a portable power bank. This will guarantee that you won’t run out of power in the middle of the night.
Depending on what type of telescope you are using, refractor or reflector, but in this stage, I always leave the telescope for a few minutes before I begin the star alignment. The telescope needs to acclimatize to outside temperatures before you can start using it. The time it needs depends on the size, so a bigger telescope will need more time to cool down. But this is not a big issue if it is a warm summer night.
3. Setting Up The Hand Controler
 2")
When you power up the telescope, the hand controller will turn on automatically.
The first thing you will see on the screen is the warning to never look through the telescope directly in the sun without the proper solar filter. It is crucial because doing so will not only damage your telescope, but it will permanently damage your eyesight.
By pressing enter, you dismiss the warning, and you can now start putting the setting in.
Location Coordinates
The first entry is your current location. You have to know your latitude and longitude which can be easily found on google maps or a GPS app on your smartphone.
Now, this may confuse you a little because if you want to take the coordinates from google maps, it will look like this: 37°15’58.7″N 115°48’39.5″W.
However, the handset wants to know only degrees and minutes. Also, the “W” coordinates will go first and “N” the second. Make sure to type it correctly because the telescope needs to know where you are to find and track the object you want to see. After you type the coordinates press enter and move to the next step.
Setting Time Zone
The time zone on the hand controller is based on Greenwich Mean Time (GMT) which is 0 for the United Kingdom. You have to know the offset based on where you are. If you are in the United States, you can find your GMT here. If you are done, press enter.
Setting The Date And Exact Time
This should be fairly easy, just put the date and press enter to move on the time. I like to set the time precisely in seconds, so make sure you have access to the clock where you can also see the seconds. Or you can just google “current time in seconds” on your smartphone and find the page with the exact time in seconds.
Double-check the time on the website with the smartphone time or wristwatch if you have one.
Prepare your time on the handset controller for a few seconds ahead and when the timer hits your preset hit enter. This will set the current time precisely on your controller.
Press enter again and move on to the daylight saving settings. Remember that if you power off the mount after this, you will have to do it again. The coordinates and the date will be stored in the memory after the power is off but not the time.
Daylight Saving
Daylight saving starts and ends on different days across the globe. In the northern hemisphere, it starts before the summer and ends before the winter. Some countries even consider canceling daylight saving and having the same time across the year. Daylight saving will add one hour to your GMT settings.
Use the up and down arrows at the bottom of the handset controller to choose if you are in the daylight saving season or not. Hit enter, and you are ready to begin the star alignment.
🔭 Want our top telescope picks for 2026?
Join 960+ astronomers getting weekly gear reviews, deals, and stargazing tips. Free.
4. The Star Alignment
The screen will ask you if you want to begin the alignment. Press 1 for yes and 2 for no. We wish to start, so press one, and now you can choose between three methods: Brightest-Star alignment, 2-Star alignment, and Daytime alignment. I won’t be talking here about the daytime method because I have never used it.
So we have two options to choose from. You can move between them by arrow keys at the bottom of the controller. Both methods will give the same tracking accuracy, so there is no difference there. It doesn’t matter what you choose; just pick what suits you the best. Let’s have a look at both methods closer.
Brightest-Star Alignment
This method is good when you have a clear view of the sky, and nothing is blocking any part of the sky. It is important because in this method you can pick only one or two stars at the beginning. After you select this method, the screen will ask you which sky you want to use for brightest star to be. You can choose from the Western sky, the Northern sky, etc.
After you select the portion of the sky, the computerized system will scan the database and will look for the brightest star. It will show you one or two stars you can choose from. Sometimes it can show you a Planet. But if you pick the planet, you will have to align two additional stars anyway. So, I recommend picking the star first to save time.
When you hit enter, it will ask you to slew the telescope so that you can see the star in your eyepiece. Try to find it first in your finderscope. It doesn’t have to be exactly in the middle of your eyepiece. Hit enter, and the telescope will ask you to center the star in your eyepiece. When you are done centering the star, hit enter.
Now you have to select the second star. You have more options now to choose from; use the bottom arrow key to pick one. It doesn’t matter if you don’t know where the star is because the telescope will automatically point to the position of the second star. After that, it will ask you again to center that star in the eyepiece.
When you are done hit enter, and you should see that the alignment was successful on the screen, hit enter. Congratulation! You have just finished the alignment, and you can start observing the sky.
2-Star Alignment
This method is good when you have a restricted view of the sky, and you don’t see the brightest stars from your position. In this method, you can pick from many stars in the first step.
It requires knowing the sky and the positions of the stars. You can help yourself with astronomy software or an app on your smartphone. There are many to choose from that will show you the exact positions of the stars in real-time.
I like to use Stellarium, which is available as an app for smartphone devices and also for PC, MAC, and Linux.
When you finally have decided on the star you want to start with, follow the instruction above as with Brightest-Star alignment. Everything will be the same from now on.
5. Choosing The Object
When you have the hardest part behind, you can start to enjoy the night sky with your computerized telescope. It is simple to pick the object you want to see. There are buttons where you can select the type of object you want to see based on if it is a Planet, NGC, IC, or Messier object.
You can also choose the Guided Tour from the menu; the telescope will show you the best objects you can see from your position that night.
Also, you can manually control the telescope with arrows in the headset’s middle. It is like working with manual mount and finding stuff through the finder scope. But here, the object will always stay in your field of view because the computerized mount will track the object for you automatically.
2 Tips For Improving Alignment Accuracy
I want to talk about 2 tips that will help you to get even better alignment.
1. Eyepieces
The first one is using different eyepieces for star alignment. When you are starting the alignment and searching for the star, use the biggest focal length eyepiece you have to locate the star easily. It will give you a wider field of view.
And when the telescope asks you to center that star, switch for a smaller focal length eyepiece with higher magnification. With this eyepiece, it is easier to position the star in the center of the view.
There is also a special eyepiece called a . This eyepiece has an illuminated reticle inside, so centering the star is more accurate. This eyepiece is not usually shipped with the telescope, so if you want one, you must buy it separately.
2. Mechanical Backlash
All computerized mounts have some mechanical backlash. To compensate for this error as much as possible, always use the UP and RIGHT buttons to finish centering the star.
If you overshoot it, move it back to the edge of the view with the DOWN and LEFT buttons and start again with UP and RIGHT. This method will reduce the mechanical backlash error in the mount, and the final tracking will be more accurate.
Conclusion
Don’t worry about this alignment process, and take it easy. The computerized mount is an excellent choice for stargazing, saving you a lot of time.
The best part for me is that it will always keep the object in the field of view. It is very helpful when you’re stargazing with more people who want to see the object, and you don’t have to keep adjusting the telescope to keep the object in the eyepiece.
Every telescope comes with an extensive user guide where you can get even more information on how to align your computerized telescope and explain deeper menu settings.
Even if this fails the first time and you struggle, there is an amazing and helpful community of amateur astronomers on the internet. They are happy to help you with anything you want to know.
You only have to ask. Join forums like