- Andromeda (M31) is visible to the naked eye from dark skies and is one of the easiest deep-sky targets for astrophotography.
- A DSLR + 200mm telephoto lens on a star tracker captures stunning detail in M31 with 30–120 second exposures.
- Shoot in RAW at ISO 800–1600, take 50+ sub-exposures, then stack in DeepSkyStacker or Siril for dramatically reduced noise.
- Use a star tracker mount (like iOptron SkyGuider Pro) to keep stars pinpoint during long exposures.
Ever looked up at the night sky and marveled at the Andromeda Galaxy’s beauty? I have, and I bet you’ve too. But capturing its magnificence in a photograph? That’s a whole other ball game. With the right tools and techniques, though, it’s not as daunting as it seems.
In my years of experience as an astrophotographer, I’ve learned a few tricks to photograph the Andromeda Galaxy. It’s all about patience, timing, and understanding your equipment. Let’s get started and I’ll show you how to take your stargazing to the next level.
Remember, photographing the Andromeda Galaxy isn’t just about the final result. It’s about the journey, the learning, and the awe-inspiring realization of our place in the cosmos. So, are you ready to capture some stellar images?
Understanding the Andromeda Galaxy
Situated approximately 2.537 million light-years away from Earth, the Andromeda Galaxy is the closest spiral galaxy to our Milky Way. It’s notably larger, with a diameter estimate ranging between 220,000 to 400,000 light years.
An interesting fact is that Andromeda is spiraling towards us! But don’t worry, it’s expected to collide with the Milky Way in about 4 billion years. This anticipated cosmic event presents a mind-boggling visualization!
The bright core, spiral arms, dust lanes, and a multitude of stars compose the aesthetic allure of Andromeda. Scientists believe it contains a trillion stars - more than twice the number estimated in the Milky Way. The sheer size and transformative beauty make it an appealing subject for amateur and professional astrophotographers alike.
When we talk about photographing Andromeda, we need to acknowledge two main components: the spiral structure and the bright nucleus. It’s not just about clicking the shutter; it’s about capturing the delicate variations in light, color, and form that define this celestial wonder.
| Measure | Value |
|---|---|
| Distance from Earth | Approximately 2.537 million light-years |
| Diameter estimates | Between 220,000 to 400,000 light-years |
| Star Count | Trillion (estimated) |
| Time until collision with the Milky Way | About 4 billion years |
Now that we have a deeper understanding of the Andromeda Galaxy, let’s look at the vital role timing plays in photographing it. Patience and planning are essential to get the best shots, considering the Earth’s rotation and ideal viewing times dictated by the season.
Remember, astrophotography is as much about the journey as it is about the end image. With the fascinating Andromeda Galaxy as your subject, you’re set to have an enriching cosmic adventure.
Essential Equipment for Astrophotography
Let’s take a look at my go-to gear for capturing the magnificence of the Andromeda Galaxy. Remember, a well-stocked toolkit can make the difference in getting the spectacular shots you’re aiming for.
First up on the list is the digital single-lens reflex camera, or DSLR for short. They’ve been a constant favourite among astrophotographers owing to their reliability and versatility. However, mirrorless cameras are also an excellent alternative, with their compact size and lightweight structure.
Next, you’ll need a fast lens. The prime lens with a large aperture such as f/1.4 or f/2.8 is ideal – these allow more light into the camera sensor, crucial for capturing detailed images of celestial objects.
A sturdy, yet easily adjustable tripod is also imperative for your astrophotography kit. When I’m out stargazing, my tripod is key for holding the camera steady while I capture long exposure shots.
Don’t underestimate the importance of a remote shutter release. This handy device minimizes shaky hands or inadvertent equipment moves, resulting in clearer shots.
Your toolkit should also include a star tracker. This device follows the movement of the stars, compensating for Earth’s rotation and allowing you to shoot for longer without star trails.
Lastly, wearable tech like smartwatches can come in handy. They can help keep track of optimal shooting times and changing weather conditions.
So, let’s summarize that in a table:
| Equipment | Purpose |
|---|---|
| DSLR or Mirrorless Camera | Captures images |
| Fast lens | Allows more light, increases detail |
| Tripod | Stabilizes camera, allows long exposure |
| Remote shutter release | Reduces shake, increases clarity |
| Star tracker | Compensates Earth’s rotation, prevents star trails |
| Wearable tech | Tracks optimal shooting times and weather |
Now that we’ve gone over some of the must-have equipment for astrophotography, we can delve into the techniques that will enhance your shots.
Planning the Shoot: Timing and Location
After you’ve got your gear sorted it’s time to plan the shoot. But remember, astrophotography is not just snapping away. It’s about precision and timing. Ideal conditions can make a world of difference to your photographs.
First off, let’s talk about timing. The best time for shooting Andromeda is during a new moon phase. That’s when you’ll get those dark skies and excellent visibility you need. Additionally, the cooler months from August to February offer optimal viewing conditions. During this time, the galaxy is high in the sky.
Below is a table that summarizes the ideal timings for photographing the Andromeda galaxy:
| Ideal Moon Phase | Best Months |
|---|---|
| New Moon | August – February |
On to location. The darker the location, the better. Light pollution from cities drowns out fainter stars and galaxies. So, you’ll want to head somewhere sparsely populated. If you’re stuck in an urban area, use a light pollution map to find the best spots nearby. The benefits of a dark spot are immense. You’ll see so many stars that the Milky Way will become visible to the naked eye.
It’s not just about finding a dark spot though. You need to consider safety, ease of access, and local weather too. Researching your location beforehand can save you a lot of trouble down the line. If possible, it’s a good idea to visit the location first in daylight to familiarize yourself with the area.
In essence, planning the shoot has two crucial elements: picking the right time and choosing the dark and safe location. Mastering these variables will drastically enhance the quality of your shots. Now that we’ve covered timing and location, let’s move on to capturing the shots. In the next section, we’ll delve deep into techniques to frame the Andromeda galaxy. There, you’ll learn how to set up your gear and navigate the night sky.
🔭 Want our top telescope picks for 2026?
Join 960+ astronomers getting weekly gear reviews, deals, and stargazing tips. Free.
Camera Settings for Capturing the Andromeda Galaxy
After we’ve touched upon the importance of careful planning and picking out the perfect spot for our celestial shoot, we are ready to delve into the technicalities. Your camera’s settings will play a pivotal role in the final outcome of your images. Let’s break down the most critical settings to perfect while shooting the Andromeda Galaxy.
Shutter Speed
For astrophotography, shutter speed is one of most important settings to consider. It governs how long the camera’s sensor is exposed to light. Longer exposures can create stunning images of the night sky, but excessive exposure can result in star trails or blurry images. To freeze the movement of the stars, I’d suggest you experiment starting with a shutter speed of 20 seconds for the Andromeda, and adjust based on your results.
Aperture (f-stop)
Next up, we got aperture, or f-stop, which dictates how much light enters through your camera’s lens. In astrophotography, we generally steer towards lower f-stops, allowing more light to enter the camera. I’d recommend an aperture setting between f/2 and f/4.
ISO
Finally, we must meddle with the ISO, the level of sensitivity your camera has to available light. Stake out for balance with ISO, too low and your image might be too dark, too high can degrade quality with noise. Start with an ISO around 1600 and then take some test shots to make sure you’re not losing important details.
| Setting | Recommended Starting Point |
|---|---|
| Shutter Speed | 20 seconds |
| Aperture (f-stop) | f/2 to f/4 |
| ISO | 1600 |
Now that we’ve laid out the basics and provided a starting point for these primary settings, remember that astrophotography is all about experimenting and tailoring these values to your unique situation. Every shoot will differ from the last. Your gear, the amount of available light, atmospheric conditions and personal preferences will all influence how you adjust these settings. Now, let’s march onwards to the next phase - framing the Andromeda galaxy.
Advanced Techniques for Astrophotography
Now that we have laid the groundwork with the camera settings, let’s dive deeper into some advanced techniques for capturing the Andromeda galaxy with your DSLR or mirrorless camera. Understanding these techniques will help you take your astrophotography to the next level.
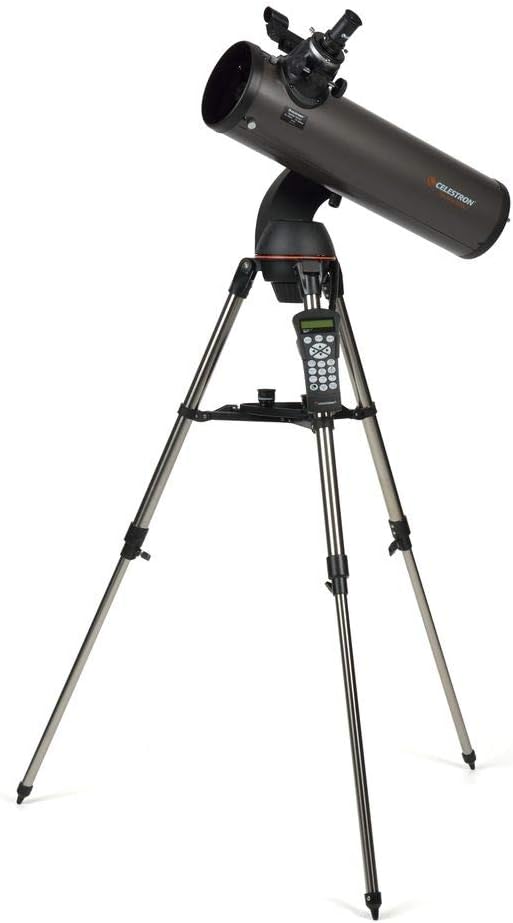
- Tracking Mount Usage – Utilization of a tracking mount can significantly improve your astrophotography results. These devices follow the movement of the stars. They counteract the Earth’s rotation, resulting in sharper images. My go-to is the Celestron NexStar, but there are other equally competent options in the market.
- Focus Stacking – Another exciting technique I’d like to mention is focus stacking. It involves taking multiple shots of your celestial object at different focus points and combining them. The outcome is a final image with superior sharpness. Focus stacking can dramatically increase the detail in your astrophotography.
- Long Exposure Noise Reduction – This is a feature you’ll find in most modern cameras. With long exposure noise reduction, your camera automatically removes digital noise from your photographs. It’s an extremely helpful feature when you’re capturing the Andromeda galaxy’s faint details.
In the table below, I’ve included the common advanced techniques along with my brief feedback on application and effectiveness:
| Advanced Technique | Application | Effectiveness |
|---|---|---|
| Tracking Mount Usage | High | Exceptional |
| Focus Stacking | Moderate | Excellent |
| Long Exposure Noise Reduction | Moderate | Very Good |
While these advanced techniques certainly help, remember that practice and patience are the two most essential aspects of successful astrophotography. Enjoy the tranquillity of the night and find your rhythm in the cosmos.
Conclusion
So you’ve learned the ropes of photographing the Andromeda galaxy. You’ve discovered the power of a tracking mount, the sharpness brought about by focus stacking, and how long exposure noise reduction can eliminate digital noise. But remember, these are tools to aid you and not shortcuts to success. The real magic happens when you combine these techniques with patience and practice.
The sky’s not going anywhere, so take your time to perfect your craft. As we’ve discussed, astrophotography is a journey, not a destination. Stay tuned for our next post where we’ll dive into the art of composing and framing the Andromeda galaxy. Until then, keep looking up and capturing the cosmos.