- iPhone 14 Pro+ is the minimum recommended for serious astrophotography - sensor size matters.
- Night mode + ProRAW - enable both in Camera settings for maximum detail in low light.
- Use a tripod - any handheld shot will blur at the 3-30 second exposures needed for stars.
- Third-party apps like NightCap or ProShot unlock manual ISO/shutter control for better results.
🌌 Get Weekly Stargazing Tips
Join 900+ astronomers. No spam, just sky.
I’ve spent countless nights gazing up at the stars, and I’ve always been fascinated by the beauty of the night sky. But it wasn’t until I discovered astrophotography that I was able to capture that beauty on my iPhone.
Astrophotography might sound like a complex art form reserved for those with high-end telescopes and expensive DSLR cameras. But with the right tools and techniques, anyone can start capturing stunning images of the night sky right from their iPhone.
In this article, I’ll be sharing my personal experiences, tips, and tricks to help you get started with astrophotography on your iPhone. Whether you’re a seasoned photographer or a beginner, you’ll find this guide helpful in your journey to capturing the cosmos.
Why Use an iPhone for Astrophotography
One might ask, why should I use my iPhone for astrophotography? Isn’t it something that requires high-end equipment like professional DSLR cameras or sophisticated telescopes? I’m glad you’re curious because I’ve been in your shoes, and let me tell you, it’s simpler than you think.
iPhones are capable of capturing astoundingly detailed images if wielded correctly. Most recent iPhone models are armed with top-notch cameras that can rival even some of the best standalone digital cameras available on the market today. Their compact size, accessibility, and technological advancement make them an excellent choice for astrophotography.
Ease of use is the biggest iPhone advantage. Unlike bulky DSLR cameras, iPhones are intuitive and user-friendly. Even a total novice can quickly learn how to capture the night’s beauty on their mobile device with a few easy steps. There’s also an array of readily available applications that are built specifically for improving our astrophotography experience. In short, iPhones are a perfect gateway into this fascinating hobby.
Moreover, it’s cost-effective. The chances are high that you already own an iPhone, so why not make the most out of what you already have? Investing in additional expensive equipment can wait until you’re certain that astrophotography is a pursuit worth diving deeper into.
Let’s not forget the iPhone’s portability. It fits right in your pocket, allowing you to take it wherever you go. This means you can capture celestial magnificence from different locations. Whether you’re in an urban setting or far removed from city lights, your iPhone is always ready to capture amazing celestial events.
Stay tuned as I share more about the do’s and don’ts of iPhone astrophotography. You’ll be armed with all the knowledge and techniques needed to take mesmerizing astral pictures with your iPhone in no time.
Essential Equipment for iPhone Astrophotography
Now that we’ve established the potentials of an iPhone for astrophotography, let’s delve into the essentials you’ll need to make the most out of this hobby. It’s not just about the iPhone; specific equipment can significantly enhance the quality of images you’ll capture.
iPhone: Yes, it’s stating the obvious but the critical requirement is of course, your iPhone. Different iPhone models offer various specs and features, so it’s crucial to know your iPhone camera specifics. The newer models usually provide more advanced camera setups and capabilities.
Tripod: No matter how steady you think your hand is, never underestimate the difference a good tripod can make. They provide stability, reducing the chances of blurred images. A lightweight, portable tripod aids in hassle-free transportation for on-the-go stargazing sessions.
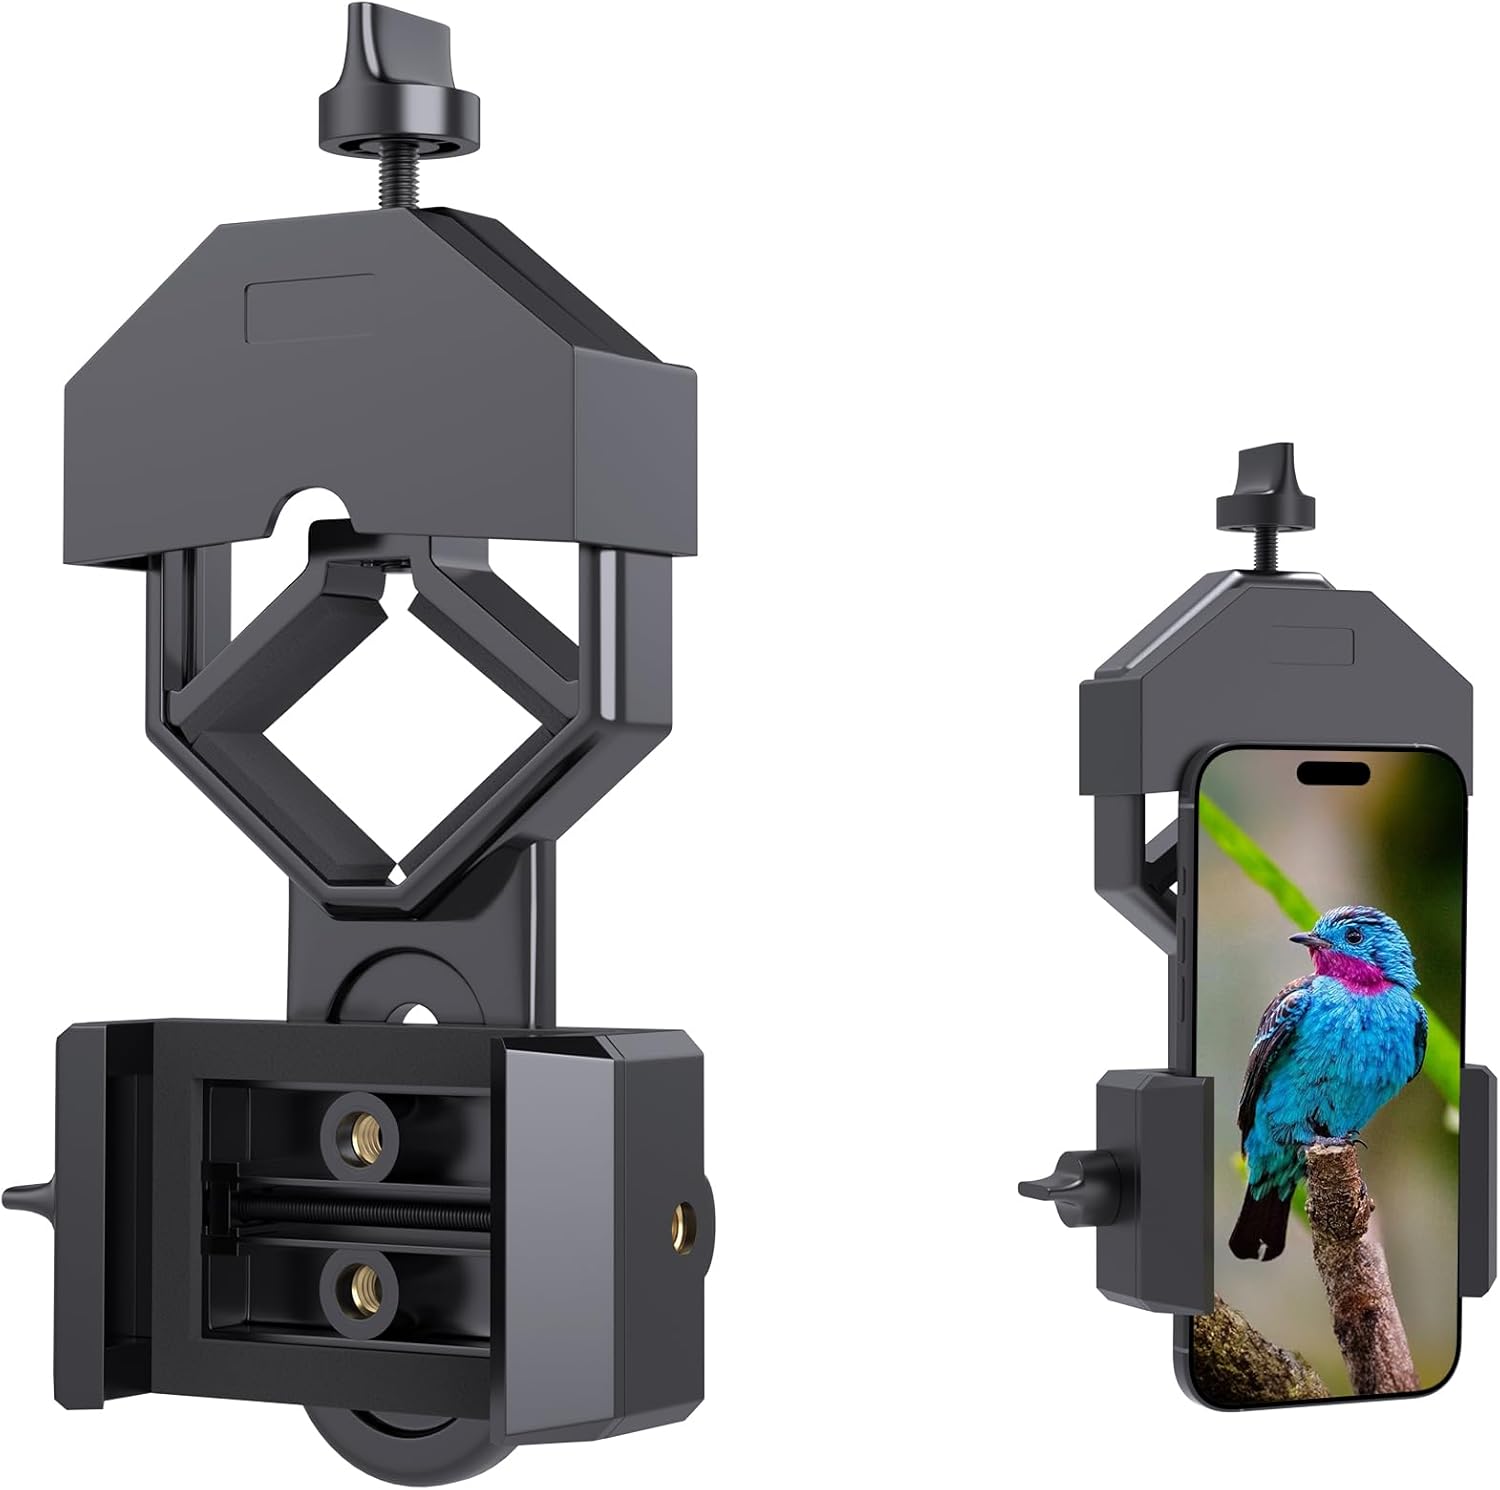
Smartphone adapter: This gadget essentially connects your iPhone to the eyepiece of the telescope. It’s designed to hold the phone in place, ensuring precise alignment during shooting. Adjustable and universally compatible adapters are most sought-after.
Telescope: Sky’s the limit when it comes to selecting a telescope. Choosing the right one can feel overwhelming but remember, high-end telescopes aren’t always necessary. You can still capture mesmerizing photos of the star-filled sky with budget-friendly options.
Apps: Plenty of astrophotography apps are available to assist, with features like star maps, augmented reality views, camera modes, and image editing tools. It’s worth spending time to see which app fits your requirements.
Finding the Right Location for Astrophotography
The first thing you’ll need to consider is how far away you need to be from city lights. Light pollution is a real thing, and it’s a major obstacle in astrophotography. Urban and suburban areas often have too much ambient light, which can wash out the stars and make it difficult to capture the Milky Way or other celestial bodies with clarity. A place with little to no artificial light is the most ideal.
If you can’t entirely escape the city lights, there’s still hope. You’d be surprised at how much you can achieve with mainly the bright planets and maybe even a galaxy or two if they’re up. Remember, it’s about experimenting and getting to know your gear, then pushing its limitations.
Secondly, the weather conditions need to be taken into account. Astrometry apps are available that can help you prepare accordingly for your shoot. These apps provide information about the clear skies, the moon phase, and hours of darkness, which are all important factors in astrophotography.
One overlooked aspect when choosing a location is the actual landscape. True, astrophotography is about capturing stars. But let’s not forget that creative compositions can take your images to a whole new level. An interesting foreground can make the difference between a good image and an outstanding one.
All in all, scouting and finding the perfect astrophotography location can make a world of difference to your iPhone astrophotography results. Use tools like Google Maps, and local knowledge to aid you in your exploration. It’s a lot of work, but the reward it’s well worth it.
🔭 Want our top telescope picks for 2026?
Join 960+ astronomers getting weekly gear reviews, deals, and stargazing tips. Free.
Understanding Night Sky Photography Apps
The world of iPhone astrophotography wouldn’t be as expansive as it is without night sky photography apps. These tools simplify the process and have a massive role in the stunning shots you can take using just your iPhone.
Let’s look at a few fundamentals to understand how these apps can help you create your stellar masterpiece.
Perhaps the most critical features are locating and tracking celestial objects. For instance, you want to immortalize the majestic Orion’s Belt on your iPhone. But how do you find it in the endless expanse of the night sky? That’s where these apps come into play. They help you identify and track objects like constellations, planets, and even satellites. All you need to do is point your phone to the sky.
Another tremendous help from these apps is the night mode. This feature goes a long way in improving the quality of your shots in low light conditions. It’s equivalent to having night vision goggles in the world of astrophotography. When using your iPhone camera in regular mode, it struggles to capture sufficient light. With night mode, you can take long-exposure shots, allowing more light in and ultimately capturing rich, detailed images of the night sky.
Furthermore, these apps can offer a treasure trove of information, including informative overlays for the moon phases, Milky Way’s position, meteor showers, comet paths, and eclipse timings. This info can be incredibly beneficial in planning your shots and understanding the best time to capture specific celestial events.
Last but not least, night sky apps come with camera control features. You can adjust camera settings from within the app. Have control over aspects like focus, exposure time, ISO, and shutter speed. This feature gives you the freedom to experiment and find the settings that work best for your shots.
Mastering Manual Settings for iPhone Astrophotography
When it comes to astrophotography, taking control of your device’s settings is crucial. The iPhone might be a user-friendly device, but astrophotography isn’t simply about pointing your camera at the night sky. There’s more to it. Understanding and mastering manual settings on your iPhone can greatly enhance your night sky photos. Here’s how.
Each iPhone generation has several advanced camera features – some of which are particularly useful for astrophotography. With Night mode and adjustable exposure time, for instance, you can tweak settings based on your needs.
Adjusting exposure helps manage the amount of light that enters the camera. When shooting at night, you want as much light as possible to reach your sensor – so you’ll need a longer exposure. But beware: too long a exposure can overexpose the shot.
Night mode offers an automatic exposure adjustment for low-light conditions. Even though it’s incredibly handy, you don’t want to solely depend on it. It’s recommended to learn how to adjust these settings manually to have even better control over your shots.
Additionally, learning to focus manually helps capture the stars more sharply. Use the focus peaking feature to ensure the stars aren’t blurred. If your iPhone doesn’t have this feature, you can rely on third-party apps.
For optimal astrophotography results with an iPhone, you should also play around with the ISO settings. Lower ISO values keep the image sharp, while higher values make it brighter. However, high ISO also introduces more noise. For astrophotography, a balance between the two is necessary.
Finally, it’s always wise to shoot in RAW format. RAW files give you more freedom during post-processing, as they store more details. Your iPhone can shoot in RAW if you’re using iOS 10 or above.
To summarize, mastering manual settings for iPhone astrophotography goes beyond merely knowing what these settings do. It’s about optimizing them to capture that perfect celestial shot.
Don’t feel intimidated! With practice and patience, these settings will become second nature, helping you take mesmerizing photographs of the night sky.
Capturing Stars, Planets, and Deep-Sky Objects
As an astrophotographer, I know capturing the splendor of stars, planets, and deep-sky objects can seem intimidating. But with an iPhone, it’s a quest within your reach.
In astrophotography, a vital step often overlooked is proper planning. Use apps like Sky Safari or Sky View to help you understand and predict celestial events. These user-friendly apps will guide you to the location of planets, stars and even galaxies, making your iPhone a portable planetarium.
When shooting stars, manually adjusting the exposure is key. A longer exposure allows the camera to collect more light, perfect for capturing stars. But remember! Too long an exposure can result in star trails due to our planet’s rotation. Star trails are aesthetically pleasing, yet if your goal is a clear starry night, strive for an exposure time under 30 seconds.
iPhone’s night mode proves useful for shooting stars and planets. It enhances the camera’s light-gathering abilities, revealing more celestial bodies than visible to the naked eye. However, note that night mode should not be used for deep sky objects, as it can oversharpen the image and create unwanted noise.
For deep-sky objects like galaxies and nebulae, the rule of ‘the more light, the better’ applies. Exploring these far-off wonders in clarity necessitates high ISO settings and long exposure times. However, beware of noise interference at higher ISO settings.
The secret sauce to great iPhone astrophotography is practice and patience. Astrophotography isn’t a pursuit mastered overnight, but with each trial, you inch closer to capturing the majesty of the cosmos just as you envisioned. And with your iPhone by your side, you’ve got one powerful tool aiding your journey. Unleash your inner astronomer and start exploring the universe ticking in your phone’s Dark Sky app.
Read also: How to Photograph Northern Lights with iPhone (Step-by-Step Guide)
Editing and Enhancing Your Astrophotography Images
After shooting the perfect celestial shot, the next vital step is editing. Remember, even in iPhone astrophotography, it’s the end product that people admire, and that often comes down to how well you’ve managed the editing process. Editing is not just about making a photo look nice, it also includes bringing out unseen features and details.
At first, you might be tempted to rely on the built-in photo editing features on your iPhone. Sure, there’s quite a bit you can do with the built-in features, but at some point, you’ll need to branch out to third-party apps to access more advanced editing techniques. Programs like Adobe Lightroom CC and Photoshop Express are among the popular choices. These apps enable you to tweak and adjust the levels of brightness, contrast, clarity, and saturation in your images without degrading the quality of the photo.
Lightroom, for example, is powerful enough to enable subtle improvements that can greatly improve the final result. You can adjust the exposure, clear noise from an image, increase sharpness, and bring out the color in the stars using its color curves module. Here’s a brief rundown of the app’s key features:
| Feature | Description |
|---|---|
| Exposure Adjustment | Adjust the brightness and contrast of your image |
| Noise Reduction | Reduce the graininess often associated with low-light photography |
| Color Curves | Enhance the colors of stars and other celestial bodies |
| Sharpness | Make the stars and celestial bodies stand out |
Adjusting the sharpness is especially important to highlight stars. But, like its counterparts, brightness and contrast, it’s all about getting the balance right. Overdoing it can lead to an overly sharp and unnatural outcome.
Don’t shy away from experimenting with different settings and effects. After all, astrophotography is as much an art as it is a science. Practice the editing process as diligently as you do the shooting, to get the most out of your iPhone for astrophotography.
Tips and Tricks for iPhone Astrophotography
So, you’re ready to truly dive into iPhone astrophotography! Having discussed the importance of planning and setting adjustments, it’s time I share some handy tips and tricks. Success in astrophotography hinges on the combination of knowledge, gear and – of course – a lot of practice.

First and foremost, you need to know your device. Each iPhone model has unique features, especially regarding camera specifications. Be familiar with the capabilities and limitations of your phone. Models like the iPhone 11 Pro and iPhone 14 Pro are more equipped for night photography due to their Night mode capabilities and enhanced camera systems.
Secondly, remember that less light pollution means more stars. Look for dark skies. There are online platforms like Dark Site Finder that provide maps indicating levels of light pollution worldwide.
Triumph in astrophotography also involves orientation and positioning. Some object in the night sky, such as the Milky Way or certain constellations, only appear during certain times of the year or from specific geographies. Apps mentioned earlier, like Sky Safari or Sky View, are precious allies here.
Every astrophotographer must also master patience. You must wait for the perfect moment! Clear sky, right season, and optimal object positioning are all factors. Make sure to get accustomed with star trailing, a skill that can amazingly transform your photographs.
Use of accessories like tripods, lenses or remote shutter release apps can elevate your images enormously – they help with stabilization and long-exposure shots. For example, Moment Wide lens provides an extra-large field of view, allows in more light, and shows more stars. However, remember accessories should complement – not substitute – mastering basic techniques.
Lastly, keep experimenting with settings. Play around with exposure, ISO, and contrast adjustments. These changes can sometimes bring out unexpected and magnificent results, especially when editing with software like Adobe Lightroom CC or Photoshop Express.
Conclusion
So there you have it. I’ve shown you how an iPhone can be a fantastic tool for astrophotography. Its user-friendly nature, cost-effectiveness, and portability make it a standout choice. By understanding your iPhone’s capabilities, seeking out dark skies, using helpful apps, and having patience, you’ll be capturing stunning celestial images in no time.
Don’t forget to play around with settings and experiment with accessories to get the best shot. And remember, a little post-shoot editing can really make your images pop. So why wait? Grab your iPhone and start exploring the cosmos from your own backyard.
Don’t forget to subscribe to our newsletter where you’ll find the latest cosmic discoveries, expert stargazing tips, and exclusive subscriber deals. Embark on your cosmic journey if you haven’t already!
FAQ
Can I use an iPhone for astrophotography?
Yes, iPhones have become increasingly user-friendly and powerful tools for astrophotography. Their portable nature and cost-effectiveness make them a viable option for capturing celestial events.
What are some tips for taking astrophotographs with iPhones?
Become familiar with your iPhone’s capabilities and limitations, seek dark locations with minimal light pollution, and use applications like Sky Safari or Sky View for orientation. Patience and experimenting with settings like ISO, exposure, and contrast are also recommended.
Are there any accessories that could improve iPhone astrophotography?
Yes, using accessories like tripods, lenses, and remote shutter release apps could greatly enhance the quality of your astrophotographs.
Is photo editing necessary for iPhone astrophotography?
While it’s not strictly necessary, editing your photos with software like Adobe Lightroom CC or Photoshop Express can help bring out the best in your images by allowing you to tweak brightness, contrast, and other elements.