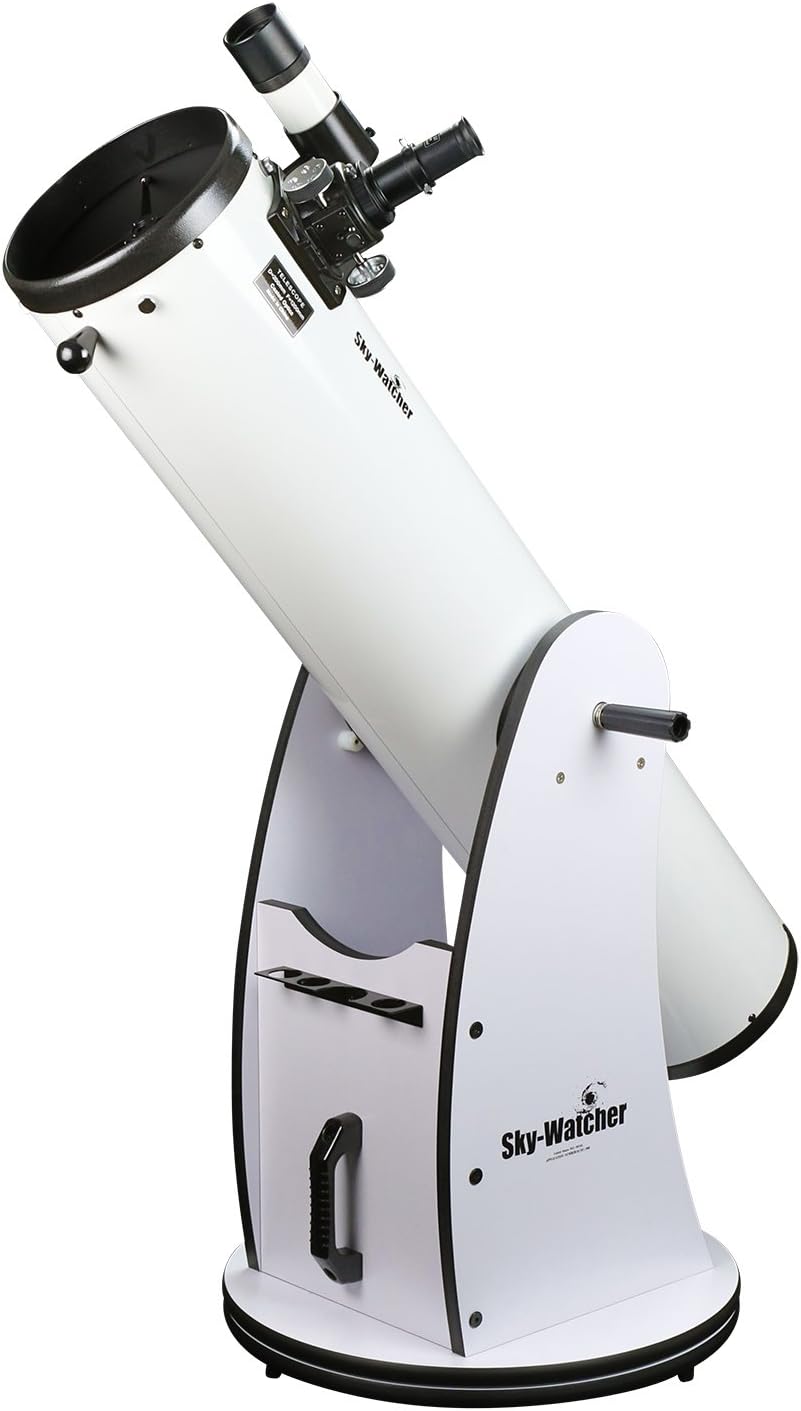
How to Build a Dobsonian Telescope? Step-by-Step Guide for Beginners

You are currently viewing How to Build a Dobsonian Telescope? Step-by-Step Guide for Beginners

This site contains affiliate links to products. I may receive a commission for purchases made through these links.

Creating a Dobsonian telescope on your own offers a personalized touch to the stargazing experience, allowing you to fine-tune the telescope to your specific needs and preferences. 

It’s an empowering exercise in creativity and innovation as you transform raw materials into a powerful instrument for exploring the universe.

If you source the materials and invest your time and effort, you can create a personalized telescope at a fraction of the cost. 

This makes it an attractive option if you are working within a budget.

Amateur astronomers looking for a personalized experience, curious individuals wanting to explore the stars, and even professional astronomers might find joy in this hands-on approach.

In this post, we’ll guide you through the essential materials, outline the construction process step-by-step and provide handy tips and insights.

Materials and tools for building a Dobsonian telescope

Building a Dobsonian telescope from scratch is an incredible adventure that combines creativity, technical understanding, and a love for astronomy. 

Here’s a detailed look at the materials and tools required to build a Dobsonian telescope: 

Primary and secondary mirrors

The optical heart of a Dobsonian telescope consists of the primary mirror and secondary mirror.  The primary mirror, typically around 6 to 8 inches in diameter for a beginner’s project, collects and focuses light from distant objects. 

This mirror’s focal length determines the overall size of the entire telescope, so it’s crucial to select the right one for your needs. 

The secondary mirror is a flat mirror that redirects this focused light into the eyepiece. 

Its alignment with the primary mirror is vital for creating a sharp image. 

Together, the primary and secondary mirrors form a Newtonian reflector mounted on the telescope, which provides a versatile and powerful viewing experience.

You will need a mirror set, such as the Cassini Telescope Mirror Set to start constructing the telescope. 

Mirror cell and mount

The mirror cell holds the primary mirror securely, preventing any misalignment due to movement or temperature changes. The mirror cell’s design must consider the mirror box, which houses the primary mirror, and the balance point of the telescope to avoid tipping or strain. 

Simple wood or metal construction can provide this support, focusing on minimizing vibrations. 

The mount for both mirrors must be robust yet adjustable, enabling precise positioning of the optics within the truss tube design.

Customizing the secondary mirror holder to your specific secondary mirror size will ensure the best performance.

Telescope tube

A sturdy cardboard tube or a pre-made cylinder, often following a truss tube design, encloses the optical elements, protecting them from dust and stray light. The choice of material and construction ensures the rigidity and alignment of the optical path. 

You can use ground boards to support the entire telescope and provide a stable foundation. The alignment between the primary mirror, secondary mirror, and telescope tube is crucial. 

Careful consideration of the focal length, bearing surfaces, and overall balance ensures an effective and pleasing telescope design.

The complete instructions for this alignment process will guide you in creating an optimized optical system.

Focuser and eyepiece

The focuser adjusts the position of the eyepiece, allowing users to bring celestial objects into sharp focus. A focuser with a beginner-friendly design, such as the Astromania High Precision Double Helical Focuser, offers a balance of precision and affordability. 

The eyepiece then magnifies the image for viewing, and different eyepieces can be used for varying magnification levels. 

The placement and alignment of the focuser with the primary and secondary mirrors are crucial for maintaining the desired focal length. 

Selecting an eyepiece that complements the focal length will provide an optimal viewing experience, whether observing planets, stars, or other celestial phenomena.

You can get an eyepiece set, such as the SVBONY Telescope Eyepiece set, that offers various viewing experiences. 

Altitude and azimuth bearings

The altitude bearings, often utilizing a rocker box design, allow the telescope to tilt up and down. The bearing surfaces must be carefully constructed to ensure smooth movement. 

Simple designs using wooden or plastic discs and turntables provide smooth movement, and Teflon pads can enhance this motion. 

The azimuth bearings permit horizontal rotation and are crucial for tracking objects across the sky. The bearing surface should be carefully constructed considering the entire telescope’s weight and balance point. 

These components ‘ thoughtful design and accurate alignment allow for precise control and easy tracking of celestial objects.

Base

The base, sometimes called the rocker box or mirror box, provides a solid foundation for the telescope. Often constructed from plywood or another stable wood, it must be sturdy enough to support the telescope’s weight. 

Thoughtful designs like the Zhumell Z10 Deluxe Dobsonian Base design that considers the truss pole configuration will balance strength, weight, and aesthetics. 

Secondary cage rings and a secondary cage can add additional support and alignment to the base structure. 

A solid and well-designed base will contribute significantly to the overall performance and stability of the telescope, allowing for smooth movements and precise positioning.

Teflon pads, adhesive, paint

Teflon pads reduce friction in the mount, providing smooth movement between the mirror box and the ground board. The pads’ placement ensures an optimal interface between bearing surfaces. 

Quality adhesives like wood glue or epoxy ensure strong bonds between parts. Paint or finish protects the wooden components from moisture and adds a pleasing appearance to the telescope. 

Selecting the right paint for the environment and applying it evenly contributes to the longevity and aesthetics of the telescope.

Hand saw or jigsaw

Whether constructing the solid base or the secondary cage, a hand saw or jigsaw, guided with care and precision, provides the needed accuracy for a beginner’s project. 

Proper cutting ensures that all parts fit together seamlessly, supporting the optical alignment and stability of the entire telescope. 

Attention to detail while cutting the mirror cells is especially crucial, as this will hold the primary mirror in place. 

Amateur telescope making often involves customizing these parts to the specific mirrors being used, and a carefully cut mirror cell ensures that the mirror is held securely without undue pressure or strain. 

A hand saw, or jigsaw is perfect for this delicate yet vital task.

Drill and bits

The assembly of a Dobsonian telescope involves various hole sizes for screws, dowels, and other connectors. A drill with assorted bits is a vital tool for this process. 

Whether you’re working on the rocker box, mirror cells, or secondary cage, attention to alignment and depth ensures secure connections between components, enhancing the structural integrity of the telescope. 

Precise drilling is essential when aligning the ground board and the mirror box. Any misalignment here could cause instability in the entire telescope. 

A strong and precise connection between these parts is crucial for a successful project in amateur telescope making, where aperture fever (the desire for larger telescope mirrors) often leads to larger and heavier designs.

Screwdrivers and wrench

Flathead, Phillips screwdrivers, and an adjustable wrench are used throughout the Dobsonian construction process, from assembling the mirror cells to attaching the rocker box. 

Quality tools and patient attention to detail will ensure tight, long-lasting connections without damaging the parts. 

These tools’ importance extends to the ground board assembly, where secure connections are vital for the telescope’s stability. 

This assembly process requires meticulous attention to the connections between the various parts, as any weak point can impact the entire telescope’s performance.

Sandpaper

Sanding the wooden parts of the telescope gives it a smooth, professional appearance. Removing splinters and rough edges from parts like the mirror box and secondary cage enhances the telescope’s aesthetics and makes handling the parts safer during assembly. 

You can use various grits of sandpaper to refine the surface, preparing it for paint or finish. 

In amateur telescope making, the telescope’s finish can be a point of pride. 

Sanding the rocker box, ground board, and other wooden components ensures that paint or stain adheres evenly, creating a visually pleasing result. 

This attention to detail, while perhaps not affecting the telescope’s optical performance, adds a layer of craftsmanship and beauty to the finished product.

Measuring tape, level, ruler

Measuring tape provides precise dimensions for components such as the rocker box and ground board, ensuring they fit together properly.

A Digital Torpedo level ensures that the telescope sits correctly on its base, especially when dealing with larger mirrors often associated with aperture fever. 

A ruler assists with drawing straight lines and precise layouts, which is especially important when constructing mirror cells and other finely detailed components. 

Precision in these areas translates to better optical performance and overall satisfaction with the finished product.

Pliers, clamps, paintbrushes

Pliers are essential for gripping and bending parts, especially when working with metal components in the mirror box or secondary cage. 

Clamps hold parts securely during gluing or screwing, keeping everything aligned as adhesives and fasteners set. 

Paint brushes apply finish evenly to wooden components like the rocker box and ground board. 

Selecting the right paint brush and using it with care adds to the visual appeal of the telescope and protects the wood from moisture and wear. 

These tools, though simple, contribute significantly to the ease and success of construction, adding to the joy and fulfillment of amateur telescope making.

Step-by-step guide for building a Dobsonian telescope

Here are the steps involved in the construction of a Dobsonian telescope:

1. Prepare the base (ground board)

The foundation of the Dobsonian telescope lies in its base. Choosing the right wood, preferably plywood, is crucial for the ground board, as it must support the entire scope. 

You must cut the wood into the desired shape that fits the mirror box dimensions using a hand saw or jigsaw. 

You must take great care to measure the wood accurately with a measuring tape, marking lines with a ruler.

Once cut to size, sand down the edges to create a smooth finish. This provides an aesthetic touch and removes any splinters or rough spots that might interfere with assembly later on. You may employ different grits of sandpaper to refine the surface to the desired smoothness.

Finally, apply a coat of paint or finish to the base. This step adds color to the telescope and protects against moisture. 

Depending on the type of paint or finish you use, this step might take a few weeks to dry properly. The finished base becomes the sturdy platform on which you mount the entire scope.

2. Construct altitude and azimuth bearings

In this critical step, you fashion and assemble the altitude and azimuth bearings. You must cut wooden or plastic discs using a jigsaw for the altitude bearings. 

Simultaneously, install a turntable or lazy Susan to create the azimuth bearing, enabling smooth horizontal movement. 

Precisely align and secure the mounting points with bolts, allowing smooth movement across both axes.

Teflon pads help reduce friction between moving parts, a vital component for ease of movement. 

Position these pads to optimize contact between surfaces, ensuring smooth, easy tracking of celestial objects—a feature characteristic of Dobsonian telescopes.

Test the movement across both axes, making adjustments as necessary. 

This ensures that the bearings function correctly, moving smoothly without obstructions or stiffness, which is essential for precise control in amateur astronomy.

3. Assemble the telescope tube

If you choose a truss design, select appropriate truss poles and cut them to the correct size, taking care to align the tube with the optical path. You must drill accurate holes and bolts for secure assembly.

The tube must be formed into the correct size and shape. The proper alignment is vital to the telescope’s performance. 

Using glue or bolting ensures the tube’s rigidity. 

Take protective measures to ensure the tube is sealed from dust and stray light. 

Double-check the enclosure to verify the tube’s integrity, contributing to the scope’s overall effectiveness.

4. Prepare mirror cell and mount

Fashion the mirror cell from wood or metal to hold the primary mirror. It must accommodate the weight and size of the primary mirror, ensuring robust support. Additionally, you ensure that the mirror cell allows adjustments for the correct optics alignment.

Mount both the primary and secondary mirrors within the mirror box. 

You must mount the secondary mirror with adjustable mounts for precise optics positioning. Carefully select and position the mounting points and bolts to prevent misalignment.

After installation, align both mirrors within the mirror box with the utmost care. 

This alignment minimizes vibrations and ensures an accurate optical path, leading to clear and precise astronomical observations.

5. Install the focuser and eyepiece

Drill holes and use bolts to secure the rack-and-pinion focuser. Proper alignment with the optical path directly affects the user’s viewing experience.

You insert the eyepiece, chosen according to desired magnification levels, into the focuser. 

Then ensure its security and alignment with the mirrors, enabling sharp focus on celestial objects.

Perform a final round of testing and adjustment to ensure that the eyepiece and focuser perfectly harmonize with the rest of the telescope. 

Fine-tuning may be necessary, but it contributes to an enhanced stargazing experience.

6. Assemble the altitude-bearing system

Attach the telescope tube to the altitude bearings, enabling the telescope to tilt up and down. Balance and alignment are critical; you must check and adjust them at the mounting points.

Like the azimuth bearing, you align the Teflon pads perfectly and secure them with bolts for the altitude bearing system. This action contributes to the smooth movement necessary for easy tracking and control of the telescope.

You also conduct a final testing phase for the altitude bearing system, ensuring smooth up-and-down movement without obstructions. It verifies that everything is aligned properly and functions seamlessly.

7. Final assembly

Connect the altitude bearing system to the base, incorporating the azimuth bearing. This is where you align the entire scope and secure the connections between components using screws or adhesive. 

You must check every mounting point for alignment and secure it with bolts if necessary. Then carefully align the mirror box within the entire scope, which now houses the primary and secondary mirrors. 

This involves meticulously adjusting and aligning the mirrors within the mirror box, ensuring they are positioned perfectly.

You may add additional adjustments, paint, or decorative touches to enhance the aesthetic appeal. Check all moving parts for smooth operation, ensuring that the telescope is ready for use.

8. Alignment and testing

Align the mirrors within the mirror box, a critical aspect of the telescope’s overall performance. Precise alignment ensures that the optical path is accurate, enhancing the overall functioning of the scope.

Always test the alignment and viewing capabilities of known celestial objects. 

You may test different eyepieces for varying magnification levels. Carefully adjust and align the optics patiently to fine-tune the telescope’s performance.

9. Final finishing

You apply any final touches, such as paint or finishes. These not only enhance the visual appeal of the telescope but also protect the wooden components.

Check all moving parts to ensure smooth operation, confirming that the telescope is ready for use.

Then perform a final inspection to ensure that all parts are securely mounted, that there are no loose bolts or screws, and that there are no gaps or holes that could affect performance.

See also: How to Motorize a Dobsonian Telescope (Tutorial)

FAQs about Dobsonian telescopes

Below, we explore some frequently asked questions about Dobsonian telescopes.

What can I observe with my self-built Dobsonian telescope?

With a decent-sized mirror and proper alignment, you can observe the planets of our solar system, including Jupiter’s cloud bands and Saturn’s rings. However, some objects might appear less detailed than in more specialized and higher-quality telescopes. 

Is building your own telescope cheaper?

Building your own Dobsonian telescope can be a cost-effective option compared to commercially manufactured telescopes of the same size and specifications. 

You can save a substantial amount by sourcing materials like mirrors, tubes, and mountings. However, the cost savings may be offset by the time and effort involved in the construction process.

It’s worth noting that the price can vary widely based on the quality of materials chosen, the size of the telescope, and whether specialized tools or professional assistance are needed. 

Read also: 10 Reasons Why Dobsonian Telescopes Are Cheaper

Dobsonian vs Newtonian telescope, which is better?

The choice between Newtonian and Dobsonian telescopes depends on your priorities and preferences. If portability and storage are key factors, a Newtonian telescope might be a better fit due to its travel-friendly design. However, if you’re looking for a budget-friendly option and are open to DIY projects, crafting your own Dobsonian telescope could be a rewarding endeavor. 

Additionally, if you’re interested in observing planets and other celestial objects at high magnification, a Dobsonian telescope’s larger focal length could offer better results. 

Ultimately, the “better” option varies based on your specific needs and goals as an astronomer.

Read also: Dobsonian vs Newtonian Telescopes: 5 Differences Explained!

Takeaway: Learn how to build a Dobsonian telescope for a personalized experience

Constructing a Dobsonian telescope is more than just a project; it’s a creative adventure. By following this step-by-step guide, beginners will gain insight into the world of amateur astronomy and acquire hands-on experience that no commercial product can offer.

The result is a personalized tool that enhances your connection with the sky. Feel the thrill of constructing your Dobsonian telescope. This guide is your blueprint, your friend, and your inspiration. 

You may also like:

Niko Feraud

Niko is an avid outdoor enthusiast with a passion for adventure. Whether he's surfing, skiing, road-tripping, or camping under the stars, Niko is always seeking out new experiences and pushing himself to new heights.