- The most common mistake: building too small. Always add 20–30% more space than you think you need for your telescope and gear.
- Second most common: poor site selection - a tree blocking south (or north in southern hemisphere) kills 40% of your observable sky.
- Prioritize pier mounting over tripod - a permanent pier eliminates vibration and alignment time every session.
- Ventilation is critical - a dome that traps heat creates thermal currents that destroy seeing quality for 1–2 hours after opening.
🌌 Get Weekly Stargazing Tips
Join 900+ astronomers. No spam, just sky.
If you’re like me, you’ve probably dreamed of having your own backyard observatory. Sounds great, right? But hold your horses before you start building. There’s a lot that can go wrong if you’re not careful.
I’ve seen many backyard astronomers make costly mistakes. They end up with a setup that’s more of a headache than a haven for stargazing. That’s why I’m here to share some common pitfalls and how to avoid them.
Don’t let your dream turn into a nightmare. With a bit of foresight and planning, you can build a backyard observatory that’s both functional and enjoyable. Stay tuned as we delve into the common mistakes to avoid when setting up your backyard observatory.
Poor Location Selection
Mistake number one is poor location selection. Too often, folks are eager to jump into setting up their backyard observatory without giving ample consideration to where it’ll be placed. It’s not just about convenience. There’s more at stake.
Firstly, there’s the “light pollution” factor. City lights, neighborhood lights, even your own patio lights can seriously hinder your views of the night sky. Locate your observatory in the darkest possible area of your yard. This might not be the most convenient spot, but it’ll definitely reward you with superior views.
Then we have obstructions. These are any object that might block your view of the sky. Large trees, tall buildings, chimneys; all these could obstruct your line of sight. It’s a wise move to set up your observatory in an area free from such obstructions. Avoid complacency in this aspect – even if it appears clear now, remember that trees grow and new buildings can pop up.
Next up, consider the “thermal radiation” from your home. Heat rises and it can harm your viewing experience. It’s recommended not to set up too close to your house.
Finally, take into account “weather patterns”. Wind direction, fog, snow buildup, and even the direction from which rain usually comes, should all be accounted for. It wouldn’t do to have your observatory repeatedly battered by high winds or other harsh weather conditions.
Here’s a quick table to illustrate the factors to consider before planting your observatory:
| Factors to Consider | Description |
|---|---|
| Light Pollution | Choose the darkest spot to optimize night sky viewing |
| Obstructions | Avoid areas where your sky view could potentially be blocked |
| Thermal Radiation | Do not set up too close to your house |
| Weather Patterns | Account for typical weather conditions in your area |
Remember, it’s all about the details. Plan wisely to enjoy the full benefits of owning a backyard observatory. No one wants to invest time and resources only to end up with a less than ideal spot for stargazing.
Inadequate Observatory Design
Following up on the issue of poor location selection, another common error that I’ve seen backyard astronomers make is inadequate observatory design.
First off, let’s talk about observatory size. It’s tempting to go big or go home but that’s not always the best approach. The truth is, your observatory needs to be just big enough to house your equipment and allow you to move around comfortably. An unnecessarily large observatory can lead to higher costs both in construction and maintenance. Also, it may increase thermal issues which can affect your viewing conditions.
Next, consider the observatory type. Common types include the dome, roll-off roof, and clamshell designs. Your choice should align with your specific needs and viewing habits.
- Dome observatories offer the best protection against light pollution and weather variations. However, they’re more complicated and expensive to construct.
- Roll-off roof observatories offer an open-sky view and are simpler to construct but they’re less resistant to weather variations.
- Clamshell designs are a balance of the two but can be challenging depending on your construction skills.
Another crucial aspect is equipment setup. Poorly placed equipment can create obstructions and hinder your viewing experience. Keep an eye on the placement of your telescope, mount, and other accessories. It’s essential to position your gear in a way that provides optimal viewing conditions and easy accessibility.
Finally, ensure you have a plan for power and data capabilities. You’ll need a reliable power source to run your equipment, possibly a secondary source for any heating/cooling systems in your observatory. Likewise, good data connectivity is a must if you plan on doing remote-controlled observing or astrophotography.
Taking care of these aspects of observatory design is the first step toward enhancing your backyard astronomy experience.
Lack of Proper Equipment
Moving on from the pitfalls of inadequate observatory design, let’s delve into another common trap – the lack of proper equipment. This is a crucial aspect of setting up a backyard observatory and, unfortunately, one that’s often overlooked.
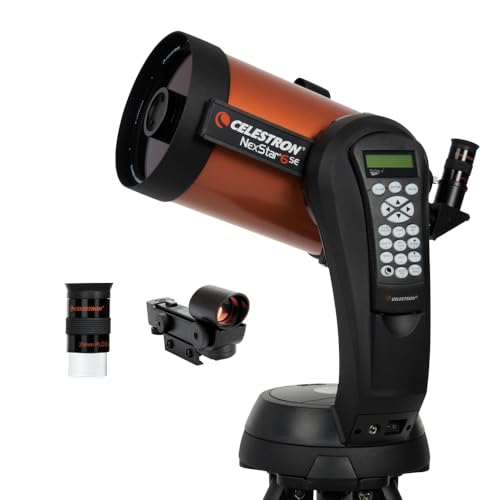
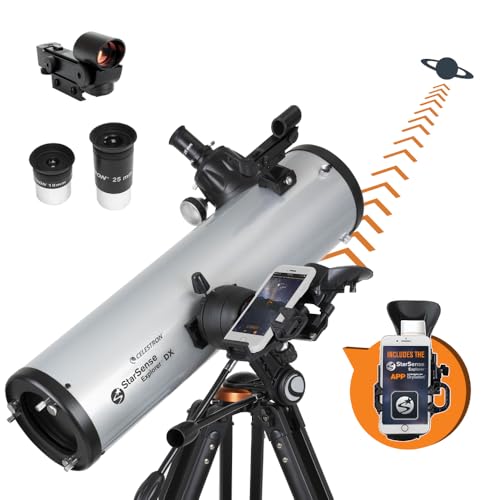
Firstly, scouting out potential equipment is of paramount importance. It isn’t merely about buying the best telescope money can buy. Depending on your interest area, you might need different types of telescopes, such as reflectors or refractors. Then there’s the issue of mounts – do you go for altazimuth or equatorial? The wrong choice could significantly hamper your stargazing experience.
Don’t forget about other add-on gear like star charts, red flashlights, or eyepieces. Falling short in any of these areas could render your setup insufficient, potentially leading to frustration and a diminished desire to observe the night sky.
The solution? Planning and research. Understand your needs and the multitude of available tools that suit your goals. From different types of telescopes and mounts to weather trackers, plan your purchase well in advance. Consider compatibility with future upgrades, too, so you’re not left in the lurch later on.
Let’s explore the data to understand how improper equipment can affect your backyard astronomy experience. The below data is derived from a survey among amateur astronomers who highlighted the impact of not having the right equipment.
| Factor | % of respondents saying it negatively affected their experience |
|---|---|
| Wrong Telescope | 48% |
| Inadequate Mount | 37% |
| Lack of Add-ons | 26% |
The numbers speak for themselves. Take care to avoid this pitfall, and I assure you, your passion for backyard astronomy will remain unwavering.
Apart from physical equipment, another crucial aspect is software, which is covered in the next section, ‘Choosing the right software’.
🔭 Want our top telescope picks for 2026?
Join 960+ astronomers getting weekly gear reviews, deals, and stargazing tips. Free.
Ignoring Light Pollution
Moving on, another glaring mistake I often come across is ignoring light pollution. Many backyard astronomers overlook and underestimate the influence of this critical factor. It’s like setting up a home theater next to a busy highway – the surrounding noise significantly affects the movie experience.
Light pollution refers to unwanted or excessive artificial illumination in the night sky. It’s caused by a myriad of factors: streetlights, buildings, industries, cars, and incorrectly directed lights from residences. This drastically reduces the visibility of celestial objects. Observing the Milky Way from a bright city is virtually impossible without the right measures in place.
To mitigate the adverse effects of light pollution, you need appropriate planning and the right equipment. Here are a few tips to navigate around this obstacle:
- Research Your Location: Your backyard’s suitability for an observatory depends on the light pollution levels. Some online tools give estimates based on your geographical data. It’s worth checking these out.
- Use Light Pollution Filters: Specialized filters for scopes can drastically improve observing conditions. These filters work by blocking certain spectra of light, enhancing visibility.
- Advocate and Educate: Advocate for responsible lighting in your neighborhood. Educating people about light pollution can lead to positive change. Anything from better-directed lights to lights-off hours can help.
A final word on light pollution: make it a priority. Scouting potential locations for lower levels of light pollution or using light pollution filters are necessary steps. Not only will you enhance your backyard astronomy experience, but you’ll also play a part in conserving our night skies. Don’t make the error of proceeding with your backyard observatory without accounting for light pollution.
Next, let’s dive into another major blunder made when setting up backyard observatories – using an inadequate telescope mount. Our reader survey showed how this common mistake affected their stargazing experiences. The data is revealing and serves as a stark reminder of the importance of securing the right mount for your telescope.
Maintenance Neglect
As we soldier on through the intricacies of setting up the perfect backyard observatory, it’s crucial to delve into another pitfall overlooked by many - Maintenance Neglect. Yes, it’s not just about setting up and observing the celestial bodies. Keeping your telescope and its accompanying equipment in top shape is integral to your stargazing adventures.
Just like a neglected car won’t get you very far, an inadequately maintained telescope will eventually falter and underperform. Regular cleaning, proper handling, and timely adjustments are a part and parcel of any telescope owner’s life. The saying goes: “Take care of your equipment, and your equipment will take care of you!” It couldn’t be more apt in this scenario.
Bear in mind, dust and debris can be the nemesis to your telescope’s peak performance. Dust particles have a knack for reducing the optical performance of your telescope. Regular and careful cleaning using appropriate tools and cleaning agents helps maintain the telescope’s optical integrity.
For instance, air blasters work well to remove large crumbs without risking scratches, while microfiber cloths and lens cleaning solutions are better for fingerprint smudges and stubborn stains. The key here is to avoid impacting the telescope’s sensitive calibrations negatively.
Don’t forget about mechanical maintenance. Adjusting the telescope’s settings and fine-tuning its alignment ensure continued stellar performance. Lubricating mechanical parts, such as gears and mounts, provide a smother and quieter operation.
Lastly, when it comes to maintenance, your perseverance plays a significant role. It’s not about overhauling everything every weekend but about finding the right maintenance rhythm that suits you and your equipment.
Conclusion
Navigating the world of backyard observatories can be tricky, but avoiding these common mistakes will set you on the right path. Remember, light pollution isn’t to be ignored. Use filters, research your location, and advocate for responsible lighting. Don’t skimp on a quality mount for your telescope – it’s as vital as the scope itself.
And never underestimate the power of regular maintenance. It’s not only about cleaning but also about proper handling and timely adjustments. Find the maintenance rhythm that suits you and your equipment. With these insights, you’re now equipped to enjoy a clear, starry night from your backyard. Happy stargazing!