- Telescope astrophotography requires three things: a telescope, tracking mount, and camera - any one being poor limits the whole system.
- Start with planetary photography (no tracking needed for short exposures) before tackling deep-sky imaging.
- Deep-sky imaging requires: equatorial tracking mount, camera with T-ring adapter, polar alignment, and stacking software.
- Budget minimum: $600–800 for a functional deep-sky imaging setup (tracking mount + basic refractor + DSLR).
🌌 Get Weekly Stargazing Tips
Join 900+ astronomers. No spam, just sky.
Astrophotography. It’s a term that stirs up images of distant galaxies, twinkling stars, and ethereal nebulae. I’ve been captivated by this remarkable form of photography for years, and I’m thrilled to share my insights with you. With the right telescope, you too can capture the stunning beauty of the cosmos.
Investing in a telescope for astrophotography can seem daunting, but it doesn’t have to be. I’ll guide you through the process, from choosing the right equipment to mastering the techniques. Whether you’re a seasoned photographer or a stargazing newbie, there’s something in the universe for everyone to discover.
So, let’s embark on this stellar journey together. With a bit of patience and the right guidance, you’ll be capturing your own celestial masterpieces in no time. Prepare to see the night sky in a whole new light.
Choosing the Right Telescope for Astrophotography
Dipping your toe into the vast ocean of astrophotography, you’ll quickly realize it’s vital to make an informed choice about the telescope you use. It is not just about bags of enthusiasm, but also about the right equipment. After all, a telescope is the central gadget in your astrophotography arsenal.
When you’re beginning, you might even wonder if your regular camera won’t be enough. And, in essence, it can capture some celestial objects. However, the precision, magnification, and detail a telescope can provide are uncomparable.
That’s why choosing your telescope is crucial, and you’ll have to take into consideration aspects like type, aperture size, focal length, and mount among others. I can’t stress enough how these factors will determine the quality of your celestial captures.
Telescopes come generally in three types:
- Refractor
- Reflector
- Catadioptric
Refractor telescopes are perfect for planetary and lunar observation. They provide high contrast and sharp images with their long focal length and can endure heavy usage.
Next, we have the Reflector telescopes. These are best at dry, high-altitude locations where the sky is often clear. They excel in capturing deep sky objects.
Lastly, the Catadioptric telescopes are a hybrid, offering the best of both worlds. Suitable in various climate conditions and versatile in capturing both deep sky and closer celestial bodies.
Quite apart from type, aperture size as well is of prime importance. The aperture captures light, and the more substantial it is, the brighter and clearer your images will be.
The focal length determines the telescope’s power. A high focal length equals more magnification, but it also means a narrow field of view.
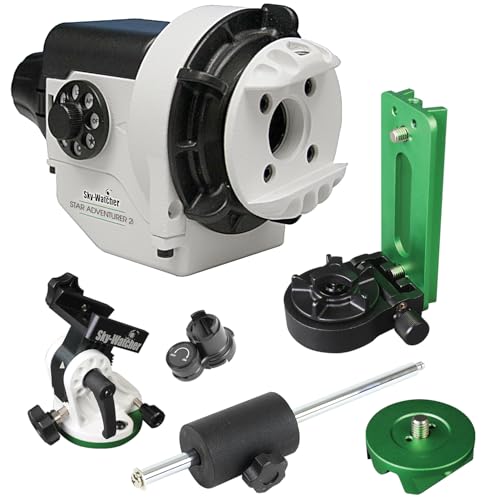
As for the mount, it needs to be stable and compatible with a tracking system to follow the Earth’s rotation. This helps to give crisp and clear shots of the cosmos.
Remember that the perfect telescope doesn’t exist; each has its upsides and downsides. It’s about finding the one that will best suit your astrophotography needs and budget.
Understanding the Basics of Astrophotography
As we delve deeper into the realm of astrophotography, it’s integral to get a grasp of its basic principles. A deviation from the norm, astrophotography demands a keen eye, ample patience and the mastery of a few additional photography techniques.
To start with, astrophotography differs from traditional photography in the sense that it requires long exposure times. This is due to the low light conditions generally associated with night sky photography. The objective here is to allow as much light as possible to hit the camera’s sensor, allowing it to capture clear, detailed images of celestial bodies.
Astrophotographers commonly use a technique called ‘bulb’ mode, in which the camera’s shutter remains open for an extended period, allowing more light in. This technique can achieve exposure times lasting minutes to hours, a stark contrast to the fractions of a second typical in conventional photography.
Another key aspect of astrophotography is the concept of ‘tracking’. As the Earth rotates, the stars appear to move across the sky. To capture clear, sharp images, astrophotographers must counteract this motion. They achieve this through motorized ‘equatorial mounts’ that rotate at the same rate as the Earth, keeping the camera aligned with its subject throughout the lengthy exposure times.
Finally, choosing the right equipment is paramount to astrophotography success. Although we’ve already dived into telescope types, it’s worth reiterating that whatever setup you choose should align with your personal needs and budget. A good astrophotography rig is not necessarily the most expensive one, but one that matches your desired outcome efficiently.
In the next section, we’ll move on to discussing post-processing techniques, which are just as vital to producing stunning star-studded images. Don’t miss out because post-processing is where your cosmic creativity truly sparkles to life. There, you’ll get the chance to bring out the best of your captured images, infuse them with your own personal touch, and truly make the cosmos your canvas.
Mastering Astrophotography Techniques
Following the selection of your equipment and accessories, it’s time to dive into astrophotography techniques. It isn’t enough to just possess the right gear. The key lies in mastering the art of utilizing this equipment to capture the night sky’s beauty.
First and foremost, understanding how to operate your telescope is crucial. Beginner or highly advanced, every scope has slightly different setups and controls. Spend time familiarizing yourself with your specific model.
Focusing the telescope is another notable technique. Due to the darkness of the night sky, this can be a tricky task. Many astrophotographers use a Bahtinov mask to aid this process. By placing the mask over the telescope’s front, it creates a diffraction pattern, helping focus on a bright star before moving on to your desired object.
Finding and tracking your subject is next on the list. The night sky is constantly moving due to the Earth’s rotation. Therefore, you need an understanding of how to navigate this vast expanse. There are numerous apps available which display a real-time map of the stars, aiding in locating and aligning your telescope.
The use of a motorized equatorial mount can help with the constant movement. It rotates the telescope at the same speed but in the opposite direction of the Earth’s rotation. This ensures your desired object stays within the frame for a longer duration, necessary for those crisp, detailed shots.
Finally, astrophotgraphy is a game of patience and persistence. Clear skies are unpredictable, equipment can sometimes fail, and capturing that perfect shot can take hours, even days. Patience truly is key here.
Throughout this voyage of the cosmos, it’s important to remember that every unsuccessful attempt is a step closer to that perfect click. Astrophotography isn’t only about stunning images; it’s a journey that intertwines with space exploration and the deep affection for the universe. It invites the persistent wonder and the exploration of the cosmic world through your own lens. As you tread on this journey, every new night will bring a chance for new discoveries, deeper understandings, and a realigned perspective of our place in the universe.
Post-processing and Editing Tips for Stellar Results
After successfully capturing shots of the night sky, what’s next? Post-processing. It’s a vital phase in astrophotography with a telescope, equally as crucial as locating and capturing your celestial subject.
To optimize your raw images, software like Photoshop or Lightroom is often used. Manipulating exposure, sharpness, contrast, and color balance will help reveal the magnificence of the cosmos captured in your images.
In the first steps of post-processing, deal with noise reduction and backscatter elimination. Noise, typical in long exposure photos, can cloud the details of your shots. A tool like the Noise Reduction filter in Lightroom can help manage this. Additionally, software such as PixInsight’s DynamicBackgroundExtraction is useful for eliminating light pollution and gradients caused by backscatter.
Next, focus on stretching the histogram. This technique facilitates the visibility of faint stars and nebulae. Photoshop’s Levels or Curves functions are handy tools for histogram manipulation. Here’s a simplified flow of typical histogram stretching:
| Step | Action |
|---|---|
| 1 | Adjust the black point to the edge of the histogram |
| 2 | Adjust the midtone slider to brighten the image |
| 3 | Add a slight S-curve for contrast enhancement |
After histogram stretching, carry on with color correction. It’s often a delicate balance to bring out the color in galaxies and nebulae while preserving natural-looking stars.
Finally, accentuating the structures and details of your subject is where sharpening comes in. Apply sharpening filters sparingly, though, as aggressive sharpening can lead to boosted noise and artificial-looking stars.
With all these steps, remember, patience is the key. It’s in post-processing where your photos come to life. But remember, just as mastering a telescope for taking photos, photo editing demands practice and gradual refinement. Keep exploring and experimenting until you find your own style and workflow that best exhibits the majesty of the night sky.
Conclusion
Astrophotography with a telescope is a journey that’s both challenging and rewarding. It’s clear that mastering the technicalities of your telescope and photo editing software, like Photoshop or Lightroom, is crucial. Optimizing your raw images, manipulating exposure, sharpness, contrast, and color balance, reducing noise, eliminating backscatter, and stretching the histogram can all enhance your astro-images.
But remember, these tools and techniques are just the beginning. The real key to stunning astrophotography is patience and practice. So, keep exploring the night sky, keep experimenting with your gear and software, and most importantly, keep learning. With time and persistence, you’ll capture the cosmos like never before. Happy stargazing!