This site contains affiliate links to products. I may receive a commission for purchases made through these links.
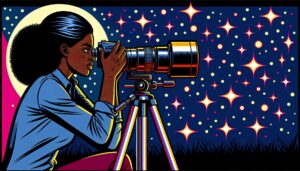
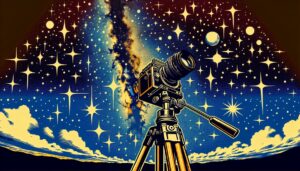
Ever gazed at the night sky and wished you could capture its stunning beauty? Well, you’re in luck. I’m here to guide you through the process of stacking images in Photoshop for astrophotography. It’s a technique that can take your night sky photos from ordinary to extraordinary.
In the world of astrophotography, image stacking is a game-changer. It’s a method that allows you to reduce noise and enhance the details in your starry sky shots. But how do you do it, especially if you’re new to Photoshop? Don’t worry, I’ve got you covered.
Benefits of Image Stacking in Astrophotography
Image stacking in astrophotography is a technique that quite literally can take your work ‘to the stars’. Where a single exposure falls short, stacking images compensates adequately. It’s not some trick or quick-fix but rather an integral part of the modern astrophotography process.
In between the capture and final product, image stacking plays a crucial role. It is all the more significant for anyone dealing with deep sky astrophotography. Why so? Well, let’s dive a bit deeper to understand.
For one, stacking helps reduce the random static or noise generated by digital cameras. It’s a common scenario while capturing long-exposure images, particularly in low-light conditions. Night sky photography being a classic case in point. To put it simply, stacking helps increase the signal-to-noise ratio (SNR) — a critical aspect in producing high-quality astrophotos.
For instance, let’s say I capture 10 images of a nebula. My individual frames might have a SNR of 1:1, plainly inadequate for a good astroimage. But after stacking, you might see the same image with an SNR ratio going up to 8:1. That’s eight times the improvement! Now we’re talking.
Another essential capability of image stacking is bringing out the finer details. It helps to merge multiple images into a single frame, which significantly enhances the visibility of the astronomical object in focus. This amplification of detail pushes the boundaries when it comes to capturing breathtaking deep-sky objects effectively.
However, this isn’t to say that image stacking is a magic wand. You’ll still need the right planning, a decent camera, an accurate tracking system, and of course, a clear night sky. But when you have all these in sync, image stacking in Photoshop can make your astrophotography efforts truly shine.
Getting Started with Photoshop for Astrophotography
In the world of astrophotography, effective use of photo editing software is crucial. The most popular of these tools is Adobe Photoshop. Despite its somewhat intimidating interface, it’s the best companion for merging and refining your cosmic captures.
Firstly, it’s necessary to mention that Photoshop is not a free tool. However, Adobe offers a free trial for first-time users. Once you’ve acquired Photoshop, it’s time to move forward with the initial setup.
Make sure to calibrate your monitor. This step is essential as it enables accurate color representation, crucial for bringing out the finer details in your celestial images. Next, you’ll need to set up your workspace. Photoshop allows the creation of a custom workspace, tailoring it to your specific needs.
After setting up, let’s dive into the software itself. Photoshop is known for its extensive array of functions and tools. In astrophotography, we will mostly be relying on the Layers, Curves, Levels, and Channels features. These tools allow for image alterations including contrast adjustments, color balancing, and noise reduction.
- Layers: Allows you to stack images on top of each other, essential for image stacking.
- Curves: Helps you control the contrast of distinct areas of the image.
- Levels: Lets you control and correct the color balance of the image.
- Channels: Assists in reducing noise.
Now you’re equipped with the basics, next comes importing the images. Simply click on File -> Scripts -> Load Files into Stack… This enables you to select and import multiple image files simultaneously. Once the images are loaded, Photoshop will align and stack them together in layers to form one single image.
Navigating and conquering Photoshop for astrophotography might seem overwhelming initially, but with practice, you’ll find that it’s an indispensable tool, empowering you to transform your raw captures into breathtaking compositions. It’s all about mastering the process, which we’ll delve into next.
Preparing Your Images for Stacking
One of the first steps I take is grouping similar exposures. This technique ensures that the stacked image will have consistent features. For better organization, I recommend arranging your files in one dedicated folder. It’ll save you lots of time while importing them into Photoshop.
Next, I’d advise you to pre-process your images. In this phase, try to adjust exposure and white balance of each image – maintaining uniformity across the stack. Pay special attention to noise reduction. It’s worth minimizing the noise level in your astrophotography images, as stacking can emphasize noise, potentially spoiling the final result.
During this phase, you may ask, “Should I fully edit the photos before stacking?” Not quite! Hold back on applying heavy image adjustments, such as sharpening or adding filters. We’ll save these edits for after the stacking process.
Here’s a quick summary of the steps for preparing your images:
- Grouping similar exposures.
- Adjusting exposure and white balance.
- Minimizing the noise level.
Remember, taking the time to prepare your images will undoubtedly pay off during the stacking process. When images are correctly prepared and imported into Photoshop, the path to creating a visually stunning, noise-free astrophotography image becomes much clearer. Let’s keep the momentum going as the journey to mastering photoshop astrophotography continues.
Stacking Images in Photoshop
First up, let’s open Photoshop and go to File > Scripts > Load Files into Stack. Here’s where all your prepped images (grouped exposures) come into play. Browse and select your bunch of images and then hit OK. Start the process with a fresh mind – because precision in this step heavily determines the quality of output.
Once your images are loaded, you’ll see each image loaded as a separate layer in Photoshop – just as you’d expect. Aren’t we off to a good start?
From here, the ball is in your court. You’re free to adjust, align, and blend the images as required. Remember, the ultimate goal is to minimize noise while maximizing the clarity of celestial bodies. Take baby steps and start with aligning – go to Edit > Auto-Align Layers, then select Auto and hit OK.
With your images aligned, you’re good to move forward to blending. Blending is a key component of the image stacking process, it helps mitigate the digital noise and magnify the fine details in the images. But, how do you blend images? Fear not – I’ve got you covered. Just select ‘Lighten’ from the blending modes drop-down menu, and like magic, your images blend to form one single, clean image.
And finally, the crucial step – image adjustment. After blending, review your image. If you see any areas where the image could be improved, don’t hesitate to make the necessary adjustments. Use the Curves adjustment to tweak the contrast and brightness of your image.
With every click and adjustment, you’re not just enhancing an image but crafting a piece of artwork that speaks volumes. It’s a bit like magic, transforming ordinary captures into extraordinary creations, but remember: the magic is in the details. So take your time, enjoy the process, and let your images do the talking.

Enhancing the Details of Your Stacked Image
Now that you’ve blended your images, time to polish that diamond. We’re not just snapping shots here, we’re creating art. Astrophotography truly merges the scientific with the artistic and there’s a world of detail waiting for you to uncover in your stacked image.
Your first instinct might be to use the ‘Sharpen’ function right away but let’s adopt a more subtle approach. Instead of ‘Sharpen’, I recommend using the ‘High Pass’ filter. It’s found under ‘Filter > Other > High Pass’. It handles nuances more delicately, honing in on the details without introducing unwanted noise.
Have your ROIs (Regions of Interest) in mind. Your image could have sections with differing brightness and color levels. Applying adjustments universally might not yield the best results.
To really bring those details to the surface, take advantage of ** ‘Layer Masks’** and ‘Adjustment Layers’. This allows you to apply adjustments to certain sections of your image without affecting others. You can create these by selecting ‘Layer > Layer Mask > Reveal All’ and ‘Layer > New Adjustment Layer’. You’ll notice your toolbox now has a white square, indicating your layer mask. Paint over the area of your image you want to adjust with the brush tool. Black conceals, white reveals.
Then, make use of the ‘Brightness/Contrast’, ‘Levels’ and ‘Curves’ adjustment layers to enhance your starry masterpiece. Remember, less is more. It’s easy to get carried away and overly adjust.
The details in your image will start to pop as you layer these adjustments. Take your time and remember, you’re here because you love this. Every moment with Photoshop is an opportunity to learn and grow as an artist. Play around, experiment. The only limit here is your own imagination.
Finalizing Your Astrophotography Masterpiece
Once you’re done with stacking and enhancing the details of the celestial images, the magic truly begins in the fine-tuning process. This next stage is where you’ll implement creative decisions to bring your astrophotography to life. Trust me, there’s no greater satisfaction than seeing your hard work culminate in a captivating final image that showcases the true beauty of our universe.
In this phase, it’s crucial to revisit the ‘Layer Masks’ and ‘Adjustment Layers’ tools. Remember, the aim isn’t to standardize adjustments across the entire picture. Instead, you’ll want to apply different levels of adjustment to various parts of your image. Apply your creative decision-making skills here.
Use the ‘Brightness/Contrast’, ‘Levels’, and ‘Curves’ adjustment layers to selectively brighten or darken specific areas. For instance, you might want the nebula — your image’s main focus — to stand out more than the surrounding stars. So, go ahead and tweak the settings, playing with contrast and brightness until your masterpiece truly begins to shimmer.
The ‘High Pass’ filter is another technique that’s essential in this stage. It significantly improves the sharpness level of your photo, adding the finishing touches to your celestial artwork.
Moreover, I can’t stress enough the importance of patience. Finalizing your masterpiece is an iterative process. This is where the true artistry in astrophotography comes in. The more time you invest, the more you’ll fall in love with the process, and inevitably, the better your result would be. This isn’t a race but a journey, just like the astronomical bodies we’re capturing.
Remember, the sky’s the limit in astrophotography. Let your creative instincts lead the way as you fine-tune each layer, each adjustment, and each pixel to perfection. The universe has plenty to give; it’s just a matter of how deep you’re willing to go to stumble upon its wonders. Enjoy the journey as you bring your astro-artistic vision to life, etching your mark in the cosmic canvas of time.
Conclusion
Mastering the art of stacking images in Photoshop for astrophotography isn’t an overnight process. It’s about enhancing details, making creative decisions, and letting your instincts guide you. The ‘High Pass’ filter, layer masks, and adjustments layers like ‘Brightness/Contrast’, ‘Levels’, and ‘Curves’ are your allies in this journey. Revisit them often to fine-tune your image.
Remember, patience is key. Each iteration brings you one step closer to your astro-artistic vision. Embrace the process and enjoy the journey. With time and practice, you’ll transform your images into true masterpieces. Let’s keep exploring the stars together, one stack at a time.