- Tracking compensates for Earth's rotation - objects stay centered without manual adjustment.
- Polar alignment is essential - point the tracking axis at Polaris for accurate sidereal tracking.
- Stepper motors with Arduino provide the precise sidereal rate needed for astrophotography.
- Commercial GoTo mounts are the turnkey alternative - they include motorized tracking built in.
🌌 Want More Stargazing Tips?
Join 900+ astronomers. Weekly sky guides, no spam.
A telescope tracking platform is essential for astrophotography and extended visual sessions. By compensating for Earth's rotation, it keeps celestial objects centered automatically. This guide covers how to build your own from scratch.
Choosing the Right Telescope
Before kickstarting your journey to build a telescope tracking platform, it’s pivotal to choose the right telescope. Selecting the right equipment is as much vital in amateur astronomy as the knowledge and patience you bring to this pursuit.
Optical Quality is the kingpin of any telescope. It’s the most significant factor that contributes to the clarity and detail of the celestial bodies. Remember, bigger isn’t always better. A small telescope with high-quality optics can provide a better view than a large one with poor optics.
As we delve deeper into the various types of telescopes, we’ll be discussing the three most commonly used:
- Refractors: These are the classic telescopes, the first to come to mind for most people. They use glass lenses at the front of the tube, a design often favored for planetary observations.
- Reflectors: They use mirrors instead of lenses. These are preferred for observing faint galaxies and nebulae, commonly known as deep sky objects.
- Compound or catadioptric telescopes: These combine lenses and mirrors in their design. They are versatile, and you can use them for viewing a variety of celestial objects.
Each type, as detailed above, has its pros and cons. Opt for the one that is in line with your goals and takes into account your budget. It’s also important to remember that an optimal telescope alone isn’t enough. To get the most out of your stargazing journey, you’ll need steady, accurate tracking that our upcoming sections on building a tracking platform will cover.
So, stay tuned as we take a turn and head straight into uncharted space: How to set the foundation for your telescope tracking platform. It’s an exciting venture; every step you take will bring you one step closer to the stars.
Understanding Telescope Tracking
So, you’ve got your ideal telescope! That’s fantastic, but there’s more to stargazing than just having the right tool. Let’s dive deeper into the heart of what makes an excellent astronomical observation experience: effective and precise tracking.
As you may know, everything in the night sky is in constant motion. This is mainly due to Earth’s rotation, which can be a significant obstacle for telescope users. Without a tracking system, your telescope, regardless of its quality, will only provide fleeting views. That’s where a telescope tracking platform comes into the picture.
These platforms help to accurately navigate the telescope to allow consistent tracking of celestial bodies. They minimize the challenge of the Earth’s rotation by moving the telescope at a similar rate and direction, mimicking the sky’s movement. It’s a key feature if you’re interested in astrophotography, where the perfect snap could require long exposure times.
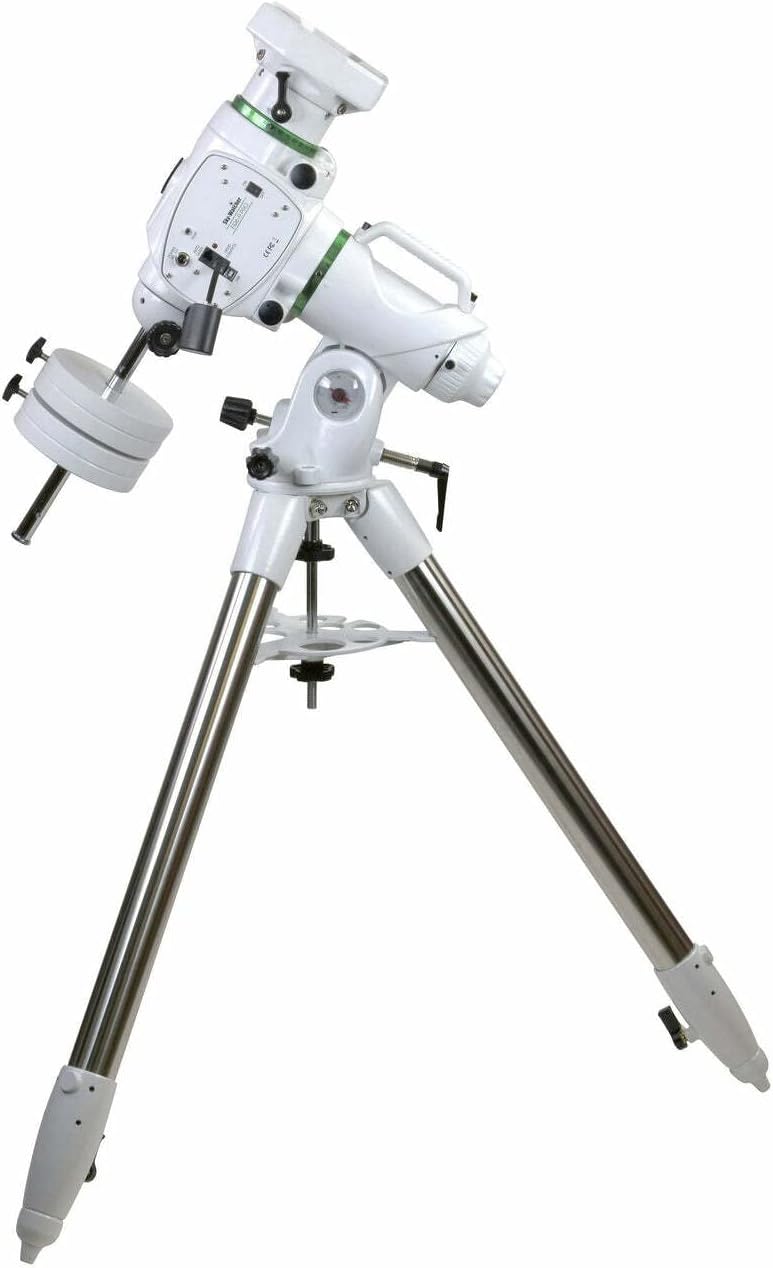
Telescope tracking platforms come in two basic types: Alt-Azimuth (Alt-Az) Mounts and Equatorial Mounts.
- Alt-Az Mounts : They move up-and-down (altitude) and side-to-side (azimuth). These mounts are often easier to use, making them great for beginners. They’re ideal for general observation and short-term tracking, but not as suitable for long-term tracking or astrophotography.
- Equatorial Mounts : These mounts rotate along an axis parallel to Earth’s rotation. They require alignment with the Polaris, also known as the North Star. Equatorial mounts offer superior tracking for longer periods and are a must-have for astrophotography.
But remember that a mount alone doesn’t make the perfect tracking system. Factors like your location, the local climate, and the telescope’s size and weight also play a role. Plus, you can enhance your tracking platform with gadgets like motor drives and go-to functionality.
This information should help clarify the importance of tracking in your astronomical endeavors. And don’t get overwhelmed with all these technicalities – just take one step at a time! Let’s move on to the next part of your stargazing journey – the assembly of the telescope tracking platform.
Designing Your Telescope Tracking Platform
When designing your telescope tracking platform, there’s a lot to take into account. Factors like your location, weather conditions, size of your telescope, and weight can affect the performance of your tracking platform.
You must consider your location because it impacts the effectiveness of your tracking system. If you’re based in the Northern Hemisphere, polar alignment will be different from those in the Southern Hemisphere. The altitude and azimuth of the celestial pole vary depending not just on your hemisphere, but also your specific latitude and longitude.
Weather conditions play a critical role too. Humidity and temperature influence the telescope’s operation. In extreme cold, the lubricants in the mounts may thicken, hampering smooth movements. Similarly, high humidity can lead to rusting of the metal parts.
The size and weight of your telescope also greatly affect your choice of mount. Heavier telescopes require sturdier mounts to support their weight. Here’s a comparison of the weight capacities of Altazimuth and Equatorial mounts:
| Mount Type | Weight Capacity |
|---|---|
| Alt-Azimuth mount | Up to 50 lbs |
| Equatorial mount | 15 to 120 lbs |
Apart from these factors, it’s essential to consider your intended use of the telescope. If you’re into astrophotography, an equatorial mount is a must due to its superior tracking capabilities. On the other hand, if you’re a casual stargazer, an alt-azimuth mount would probably be more suitable for general observation.
As you can see, designing your telescope tracking platform is not an easy task. But do not fret - take it step by step. Think about what you really need from your mount and how it can enhance your stargazing or astrophotography experience.
🔭 Want our top telescope picks for 2026?
Join 960+ astronomers getting weekly gear reviews, deals, and stargazing tips. Free.
Gathering the Necessary Materials
It’s important to have all the necessary materials ready before building a telescope tracking platform. These components are widely available and can be sourced either online or from local stores in your area. Remember, the functionality of the platform directly depends on the quality of these components. It’s always a good idea to strike a balance between cost-effectiveness and quality.
Before you begin sourcing your materials, it’s best to create a list. Not only will it improve your efficiency, it’s a great way to keep track of the items you’ll need.
Here are some crucial components you should include in your list:
- Mount: Either an Alt-Azimuth or an Equatorial mount, based on your intended use of the telescope.
- Metal Bars: For the base and rocker. Durability is key, so consider materials like stainless steel or aluminium
- Ball Bearings: Used in the pivot point for smooth rotation of the platform.
- Motor and Gears: To enable auto-tracking. The motor speed should be adjustable to match the Earth’s rotation.
So, where can you find these items? All of these are available at an electronics or hardware store. Additionally, astronomy outlets and specialized online platforms stock telescope-specific components. Remember, original quality products last longer and improve the overall performance of the telescope.
Let’s not forget about the tools! After all, you can’t build an effective tracking platform without the right tools. At minimum, you’ll need a set of screwdrivers, a drill, a hacksaw, and wrenches. A level is also helpful in making sure your platform is well balanced.
Before we move on with the actual construction, I want to encourage you to do a few things: do your homework, plan ahead, and always prioritize quality over cost. Avoid shortcuts during the material gathering phase. In the long run, your passion for stargazing will be rewarded by the quality of the images you are able to capture with your telescope.
Building the Telescope Tracking Platform
Moving forward, it’s crucial to meticulously plan your telescope tracking platform’s construction. A well-thought-out approach will yield a high-performance tracking system.
Firstly, sketch out a detailed blueprint on paper or use a design software. A well-laid-out plan takes into account the materials you’ve compiled: the mount, metal bars, ball bearings, motor, and gears. This step is indispensable as it ensures you have all the necessary components before you start building.
Secondly, start assembling the components, begin with the mount. Ensure it’s sturdy and well-balanced; it forms the core support system of your tracking platform. Next, affix the metal bars to provide a frame that can withstand your telescope’s weight. Remember, a firm foundation ensures better stability and accuracy in tracking.
When incorporating the ball bearings, place them strategically to allow smooth rotation of the platform. The gears and motor play a pivotal role in precise tracking of celestial bodies. Be sure to connect the gears appropriately to the motor, ensuring their rotation is synchronized with the tracking process.
Finally, consider integrating a controller into your platform. The controller governs the motor speed and direction, crucial for accurate alignment with astronomical objects. Most modern controllers come with the capacity to store star maps and tracking speed presets to make tracking easier and more efficient. However, handle this component with care as it’s rather delicate.
Building a telescope tracking platform might sound daunting, but with careful planning, it can be a fruitful endeavor. Being organized in your approach will make the process more streamlined and manageable. Moreover, using quality products and having the right tools on hand will make the job easier. The time and effort invested will be well worth it when you’re able to track celestial objects with precision.
Also, it’s worth mentioning that regular maintenance is needed once you’ve completed your build. Always keep an eye out for damage, and fine-tune components often. The longevity of your platform depends on how well you care for it.
Testing and Troubleshooting
Once your telescope tracking platform is assembled, it is crucial to run initial tests to ensure everything’s functioning as expected.
One essential test method is drift alignment. This technique aligns your telescope with the Earth’s axis of rotation. First, point your telescope at a bright star near the celestial equator and monitor its movement. If everything is correctly assembled and calibrated, the star should stay stationary in your telescope’s field of view, notwithstanding the Earth’s actual rotation. If the star drifts, adjustments will be necessary.
To improve accuracy further, performing a polar alignment can make a big difference. During this process, you’ll need to align the telescope’s rotational axis with the Polar Star.
In the event things aren’t going as expected, don’t worry. Here’s some troubleshooting guidance that I’ve found useful through years of experience:
- Mechanical issues with the platform: Often, it’s the simple things that prove the trickiest. Ensure your metal bars are firmly in place, the ball bearings move freely, and the gears are properly interlocked. Do listen out for any unusual noises when it’s operating: they could signal a component isn’t functioning as it should.
- Accuracy of the controller: The controller plays a vital role in aligning your telescope with celestial objects. Confirm that it’s calibrated correctly and not experiencing issues.
- Battery and power supply issues: Often forgotten, but critical. Look for any potential power leakage and check that the supplied voltage matches the motor’s requirement. Power fluctuations from the source can impact performance of the platform too.
Remember, patience is key. Building a telescope tracking platform from scratch is no small feat. It’s likely you’ll encounter a few mountains before you can fully enjoy the fruits of your labor. Keep learning, stay stubborn, and you’ll get there.
Building a telescope tracking platform is no small feat. It’s a task that demands patience and persistence. But remember, the rewards are well worth the effort. Once you’ve successfully built your platform and ironed out any issues through testing and troubleshooting, you’ll have a tool that can help you explore the cosmos like never before.
So don’t be disheartened by the challenges you may encounter. Keep testing, keep troubleshooting, and most of all, keep reaching for the stars. The universe is waiting for you.