- 6-8 inch telescope covers
- Large telescope covers
- Outdoor waterproof telescope & mount cover
- How to make homemade telescope covers?
- FAQs about telescope covers & cases
🌌 Want More Stargazing Tips?
Join 1,000+ astronomers. Weekly sky guides, no spam.
This site contains affiliate links to products. I may receive a commission for purchases made through these links.
Telescopes can be expensive, and when you have spent your hard-earned money to get one, you want it to give you the best stargazing experience.
However, to keep your telescope working perfectly, you must take good care of it, especially when stored.
Telescope covers can protect the delicate optics of your expensive equipment from weather elements, dust, and scratches. Investing in a high-quality cover goes a long way in ensuring that your telescope works flawlessly every time you want to immerse in the beauty of the universe.
High-quality telescope covers are much more than just a piece of cloth covering your telescope. They protect your telescope from dew buildup and UV rays of direct sunlight. It is essential if you are planning to store your telescope in a garage or close to an open window.
This guide will help you understand what you should look for when buying telescope covers so you can pick the one that is best for you. We will also review some of the top-rated telescope covers available.
If you are looking for a simple, easy-to-use reflective telescope cover, the Astromania Protective Telescope Cover is a great option. It is a thermally stable, pull-on cover that protects against moisture as well as dust. The cover has a unique silver coating on the outside that repels water and keeps your telescope dry even in the rain.
Telescope dust-proof covers


Protecting your telescope from dust should be a top priority if you want it to keep enjoying it. This BOSKING Dust-Proof Astronomical Telescope Cover comes with an adjustable drawstring.
It is made of 420D Oxford fabric with silver coating on the outside. It is also tear-resistant. It can protect your telescope from the sun, rain, UV, snow, dust, and moisture.
Gicov Telescope Cover is another great option for your telescope. It can provide all-around protection for your telescope and save you regular cleaning time.
6-8 inch telescope covers
6-8 inch telescopes are some of the most popular telescopes among astronomy novices and experienced stargazers. These telescopes are compact and offer a great stargazing experience.
When choosing a telescope cover (6-8 inches), you should ensure that it offers excellent protection from dust and rain and covers the major height of your telescope.

One product in this category we recommend is the HABOPET Telescope Cover. It is a simple cover that will fit most 6-8 inch telescopes and provides good protection from moisture and dust.
Telescope cover 6″ Newtonian
A 6″ Newtonian telescope is one of the most popular telescopes among astronomy enthusiasts, thanks to its compact design and ease of use.
The mirrors and optics of a Newtonian telescope are pretty sensitive to dust and moisture, so pick a cover that is not too big for the telescope.

We highly recommend the NEWFOM Telescope Cover for a 6″ Newtonian telescope. It is made from high-density polyester and is completely waterproof. The cover’s exterior is coated with a silver-coated protective layer, making it UV resistant.
You may also like: Maksutov Newtonian Telescopes (In-depth Guide)
Large telescope covers
Large refractor telescopes are pretty heavy and usually are mounted in one place for your star parties. Many people have these refractor telescopes mounted in their garages or sheds, making it essential to protect them from weather and dust.
Orion 15206 cloak cover
Orion is the most popular telescope brand globally, and we have tested and reviewed several of its products. The Orion 15206 cloak cover lives up to the high expectations.
The Orion cover has the most features you would expect. It is waterproof, easy to use, puncture resistant, and offers thermal stability and UV protection. So, what makes it better than other covers?
Well, it comes down to the choice of materials. Orion has used high-quality think fabric in this cover, and according to the company, it contains three layers.
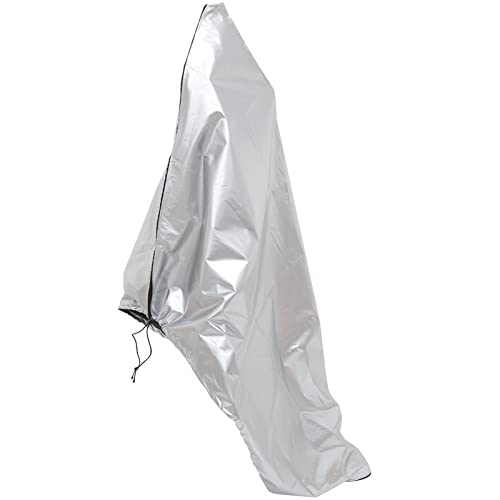
Outdoor waterproof telescope & mount cover

This COOSOO Telescope Cover is a waterproof telescope protector and perfect for outdoor. It has an adjustable drawstring zipper and a silver coating that prevents the interior of the telescope from getting heated up by the sun.
It is a multi-purpose telescope cover that protects from dust, snow, rain, UV, etc.
How to make homemade telescope covers?
Making a homemade cover that can protect your telescope from weather elements and dust is relatively straightforward. Here is how you can easily make one at home.
Materials needed:
- A measuring tape or ruler
- Durable fabric (nylon or polyester)
- Scissors
- Sewing machine or needle and thread
- Elastic band
- Drawstring cord
Steps to make your homemade telescope covers
- Measure the length and width of your telescope, including leg height, to determine the dimensions for the cover.
- Cut the fabric to the desired size, adding a few extra inches to the width and length to ensure a proper fit.
- Sew the elastic band onto the bottom of the cover, stretching it slightly as you go to ensure a snug fit around the telescope’s base.
- Thread the drawstring cord through the channel, leaving enough length on both ends to tie a knot.
- Once the drawstring cord is in place, cinch the top of the cover closed and tie the ends in a secure knot.
FAQs about telescope covers & cases
Here are some frequently asked questions about telescope covers & cases.
Do telescopes typically include cases when purchased?
Most small and medium telescopes come with a carrying case or a cover, but large telescopes may not.
Do I need to cover my telescope?
Yes, you must cover your telescope to protect it from dust, water, and UV rays of the sun that can damage it easily.
What is the best telescope cover for a 16-inch Dobsonian?

If you own a 16-inch Dobsonian, we recommend the Orion 15207 Scope Cloak, an excellent, simple-to-use cover. It is made from a piece of very high-quality fabric and offers excellent weather protection.
You may also like: 10 Reasons Why Dobsonian Telescopes Are Cheaper.
What is the best Celestron NexStar 5SE telescope cover?
If you are looking for a Celestron Nexstar 5SE telescope cover, we recommend trying the NEWFOM Telescope Cover. It fits the telescope perfectly and offers excellent protection.
You may also like: Celestron NexStar 5SE Telescope
How do I carry a telescope when traveling?
You should carry your telescope in a high-quality carrying case with a shoulder strap that fits your model and protects its delicate parts.
What is a good dust cover for the Meade telescope?
The BOSKING Telescope Cover is one of the best dust covers for the Meade telescope.
What is the best telescope cover for Meade Polaris?
If you are looking for a telescope cover for Meade Polaris, you can try Milisten Telescope Cover. It is a sturdy cover that can protect your expensive telescope from water, dew, and dust.
What is the best telescope finder scope cover?


We highly recommend Celestron – Aluminum Telescope Dew Shield with Cover Cap if you need a high-quality telescope finder scope cover. It can fit several 8” models from Celestron.
Another good, general-purpose finder scope cover is Astromania Flexible Dew Shield. It helps keep the dew away and gives you a great night sky view. If you are interested in lens caps, we highly recommend the Astromania Dust Caps Set, which is available for different lens sizes.
Can I use a barbecue cover to cover my telescope?
Using a barbecue cover for a telescope is not a great idea as it most likely won’t fit your telescope and offer little to no protection from dust and water.
Takeaway: Get good telescope covers & cases to extend the life span of your telescope
A telescope cover can help protect your telescope from dust and weather elements and ensure you have the best observing sessions every time you use it. A high-quality cover that fits your telescope is necessary for good protection.
Several good telescope covers are available on the market, with unique advantages and drawbacks.
However, picking the right cover can prolong the life of your telescope for years of star viewing pleasure.
You may also like:
- 27 Best Travel Telescopes (Ranked!)
- 15 Things to Avoid When Using a Telescope
- Meade ETX 60 AT Review (Read This First!)
🔭 Never Miss a Guide
Get telescope reviews, buying guides, and stargazing tips. Free, weekly, no spam.