- An equatorial platform converts any alt-az scope into a tracker - ideal for Dobsonian owners who want to track celestial objects.
- The arc radii depend on your latitude - calculate carefully before cutting your platform boards.
- A stepper motor with Arduino provides the precise sidereal rate needed for tracking and photography.
- Platforms support 1-2 hours of tracking before needing to be reset to the starting position.
🌌 Want More Stargazing Tips?
Join 900+ astronomers. Weekly sky guides, no spam.
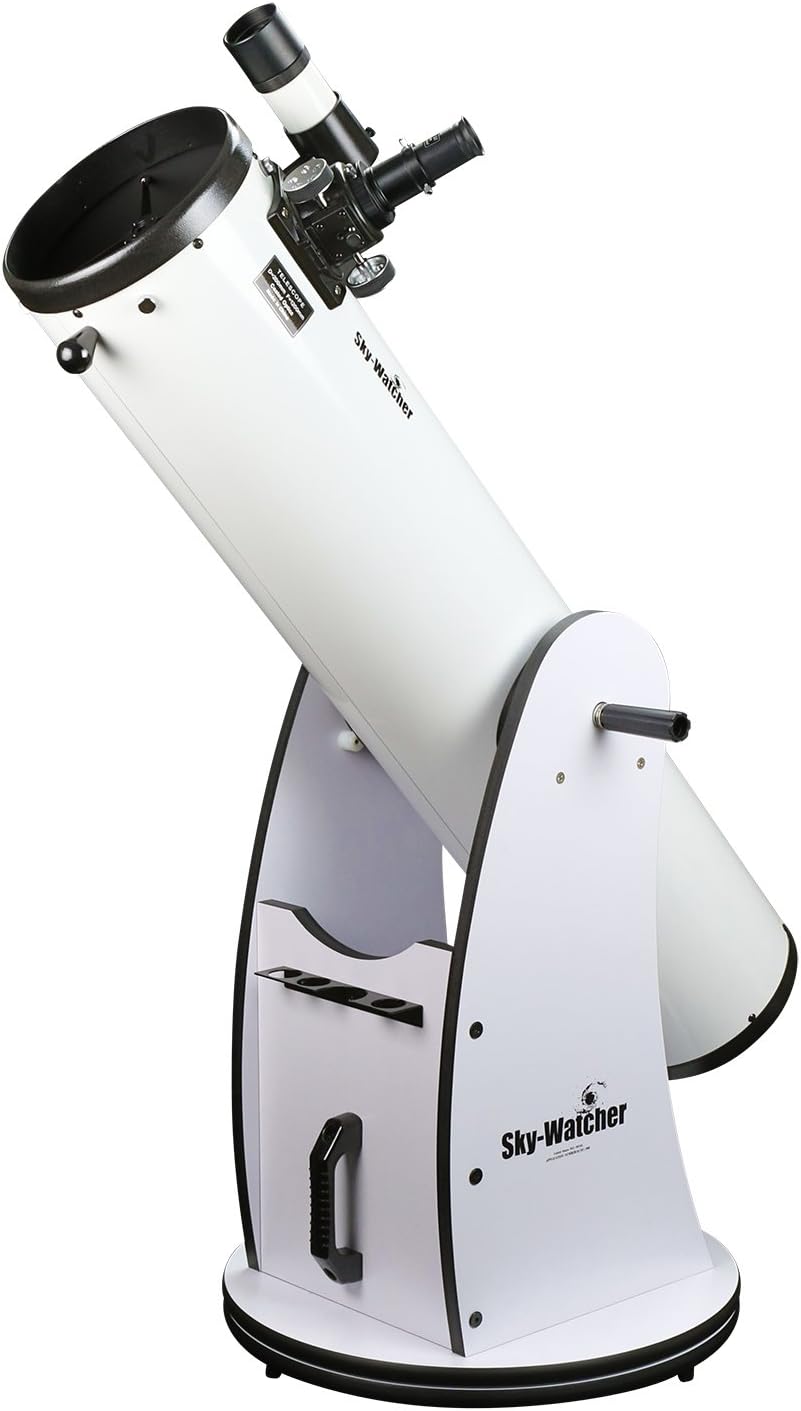
A motorized equatorial platform is one of the cleverest DIY projects in amateur astronomy. It converts any alt-azimuth or Dobsonian telescope into a tracking instrument, enabling long visual views and astrophotography without an expensive equatorial mount.
Choosing the Right Design
Embarking on the journey of building a motorized equatorial platform requires careful thought before diving into construction. To enhance your star-gazing experience it’s vital to choose the right design for your platform.
Size and portability are the top factors you should be paying attention to. Remember, the size of the platform should match the size of your telescope. A smaller scope will fit on a more oversized platform but the converse isn’t true. So, don’t make the mistake of choosing a design that’s too small for your scope. If you are the type to travel with your telescope, consider a design that’s easy to transport.
Here’s a markdown table to illustrate the different designs and their specs:
| Design | Size | Portability |
|---|---|---|
| Type A | Big | Low |
| Type B | Medium | High |
| Type C | Small | Medium |
With Type A, you’re getting a large platform suitable for bigger telescopes. It’s heftier and less portable but gives a stable platform. On the other hand, Type B offers a compromise between size and portability, ideal for medium-sized scopes. Type C caters to smaller scopes, offering decent portability.
Beyond these factors, you’ll need to consider how much time you’re willing to put into building your platform. It’s easier to find ready-made designs online, but retrofitting them to suit your needs might take a significant amount of time. And if you’re thinking about creating your own design, well, that will take a fair bit of work. There’s no one-size-fits-all solution. What you choose relies heavily on your specific needs and circumstances.
So, do your homework before deciding on a design. An adequately chosen design will ensure your motorized equatorial platform runs smoothly and delivers the stargazing experience you’re after.
Gathering the Tools and Materials
As we dive deeper into the quest of building a motorized equatorial platform, gathering the right tools and materials is essential. It’s a fundamental step in our journey. We need to prepare a list of required tools and materials, be it from your local hardware store or online marketplaces. Let’s go over what we’ll need.

I recommend starting with the essentials: a sturdy piece of wood or metal for the base and top platform, suitable enough to carry the load of a telescope. With the slot made for the motor, it links to, it’s crucial to have a proper alignment. Don’t forget about the equatorial wedge, which is the instrument responsible for matching the Earth’s axial tilt.
For the technical part. We should procure a clock drive motor. It’s worth noting that the exact type may vary based on the specifics of your platform design. Hence, conduct an in-depth analysis of your design to understand better what fits best for you.
Next, screws, nuts, and bolts – a must-have for any DIY project. These will secure all your parts tightly together. Make sure they are sturdy and rust-resistant.
As for the tools, you’ll need:
- Power drill
- Circular saw (if you’re using wood as your base)
- Screwdriver
- Wrench
- Level
- Compass
- Tape Measure
Remember, safety is paramount. Always wear safety glasses while handling these tools.
Once everything’s in place, it’s time to begin assembling. But before we dive into that process, I’ll be discussing the step-by-step guide on how to assemble a motorized equatorial platform; walking you through every bit of the process in the following section. Here’s the fun part, folks, creating your very own motorized equatorial platform.
Building the Base
When starting to construct a motorized equatorial platform, building a robust base is arguably the most critical step. In fact, the base sets the tone for the entire assembly process and determines the ultimate performance of the platform.
First, selecting the right material is vital. I recommend using heavy-duty wood such as maple or oak. Their durability holds up against the weight of the telescope and the motor. Aluminum or stainless steel are also excellent choices, especially if you aim for a more modern and professional-looking platform.
While constructing the base, don’t forget about the equatorial wedge. This piece is of significant importance, especially for stargazing in different latitudes. Installing the equatorial wedge at the right angle can optimize your stargazing experiences.
As for the dimension, the size of your telescope should guide it. Ensure there’s enough surface area to safely mount the telescope without any overhang. Ideal base dimensions offer the perfect blend of stability and portability.
Keep in mind what I was saying before, the construction doesn’t end with the selection of materials and creation of the base. It’s vital to secure all base components tightly, and that’s when your fixings come into play. Stainless steel screws, nuts, and bolts are perfect for joining the components and ensuring the durability of the platform.
| Preferred Base Building Materials | Suitable Fixings |
|---|---|
| Heavy-duty woods (Maple, Oak) | Stainless steel screws |
| Aluminum | Stainless steel nuts |
| Stainless Steel | Stainless steel bolts |
Head straight to the next section, “Assembling the Top Platform”, immediately after you’re certain of a sturdy base. We’ll delve into details about securing the top part of the set, onto which your telescope will ultimately rest. We’re still a long way from finishing this motorized equatorial platform, but trust me, the results are going to be well worth your efforts.
🔭 Want our top telescope picks for 2026?
Join 960+ astronomers getting weekly gear reviews, deals, and stargazing tips. Free.
Installing the Drive System
After establishing a strong base and setting the equatorial wedge, we’re now ready to dive into the heart of the action – installing the drive system. Installing the correct drive system is imperative to ensuring your motorized equatorial platform operates seamlessly and effectively.
The main ingredients for the drive system are a motor, gear, and a speed controller.
Motor Selection
The motor is what’s going to power the movement of your platform. I’d suggest opting for a dedicated, high-torque DC motor. This typically provides the most consistent, smooth movement, which is an essential factor for stargazing. Furthermore, it’s critical to choose a motor that’s well suited to your platform’s weight and friction levels.
Gear Installation
The next step is installing the gear system. The gears play a crucial role in precisely controlling the rotational speed of the platform – a vital factor for astrophotography and stargazing. A worm gear system is commonly used, due to its high precision and reduction ratio. When installing, ensure the gears mesh correctly and without excessive stress or slack. This can take a fair bit of trial and error, but it’s worth getting just right.
Speed Controller Integration
Lastly, integrating a speed controller is essential to accurately control the motor speed. The earth rotates approximately 15 degrees per hour, so it’s essential to ensure your platform mimics this to maintain object tracking accuracy. A speed controller can help you fine-tune your platform’s rotation speed to match the earth’s rotation. Many people choose to use a digital model for its accurate and easy adjustments.
As we move on, we’ll cover the electrical wiring and fine-tuning of the automated system. However, even without a conclusion here, it’s clear that your choice in drive system components plays a pivotal role in your platform’s performance.
Wiring and Connecting the Electronics
Now that we’ve tackled the drive system mechanics, it’s time to dive into the wiring and connection of the electronics. This part of the motorized equatorial platform project can seem intimidating, but with patience and the proper tools, it’s a challenge you can master.
First, let’s discuss the key components you’ll be working with:
- The motor
- The speed controller
- The power supply
The motor wires must be correctly connected to the speed controller to ensure they rotate in the right direction. Be sure to check the motor’s documentation for specific wiring instructions. Often, there’s a red wire for positive, and a black wire for negative.
The speed controller should be wired to the motor and then to the power supply. Make sure you’re using the correct voltage supply as specified by both the motor and controller manuals. Most motors will have a voltage range so you can adjust it to accommodate different speeds.
When it comes to fine-tuning the setup, a digital multimeter is your best friend! Use it to check the voltage values across the motor terminals. Check the output regularly, ensuring you’re receiving the correct voltage from your power supply.
Connecting everything together requires knowledge of soldering. This is a process that joins together wires by melting a filler metal into the joint. If you’ve never soldered before, there are tutorials and guides available online. Get comfortable with this skill before attempting to wire your setup.
Finally, ensure all wires and connections are secured and insulated to prevent any electrical shorts. Good practices include using heat shrink tubing over soldered joints, and arranging wires neatly to avoid entanglement and wear.
As you can see, wiring the electronics isn’t just about making connections. It’s about understanding how each part works together, and ensuring the entire system operates smoothly. Before moving to our next section, double-check each connection and measurement. Take your time – precision is the key in this phase.
Testing and Calibration
Once you’ve properly connected and insulated your wires, it’s time to move to the Testing and Calibration stage. Fine-tuning your motorized equatorial platform is of utmost importance to ensure accurate tracking of your celestial targets.
First, we’ll check the motor output. Power up your platform and check if the motors are running smoothly and in the correct direction. If not, reverse the motor wires at the speed controller. This action should correct their rotation.
In addition, it’s critical to monitor the motor’s voltage. Connect a digital multimeter to your speed controller. This versatile device gives you a direct reading of your motor’s output voltage. If your motor’s voltage isn’t stable or if it’s not meeting specifications, consider adjusting your speed controller or swapping out your motor.
To ensure your platform tracks targets correctly, calibration becomes necessary. Start by picking a stationary object to use as your reference point. Then adjust your speed controller until your motor’s speed matches the object’s apparent motion. Bear in mind this process can require a hefty dose of patience. It’s not a task that’s completed once; it’s a process of continual adjustment.
Table 1: Testing and Calibration Parameters
| Test | Instrument | Action Required |
|---|---|---|
| Motor Direction | – | Reverse motor wires if required |
| Voltage Check | Multimeter | Adjust speed controller / Replace motor |
| Tracking | – | Adjust speed controller to match object’s motion |
So there you have it! Building a motorized equatorial platform isn’t as daunting as it may initially seem. With careful attention to the testing and calibration stage, you’ll be on your way to capturing the cosmos in no time. Remember, it’s all about ensuring your motor runs smoothly and in sync with the apparent motion of your celestial target. Monitoring the motor’s voltage with a digital multimeter and adjusting the speed controller are key steps to achieve this. So why wait? Start building your platform today and open up a whole new world of astronomical exploration.
Become a part of our galactic family by subscribing to our newsletter. Explore the mysteries of the universe with our curated content, designed for both novice stargazers and astronomy aficionados. If you’re intrigued by the vastness of space, this is your chance to dive deeper!