This site contains affiliate links to products. I may receive a commission for purchases made through these links.
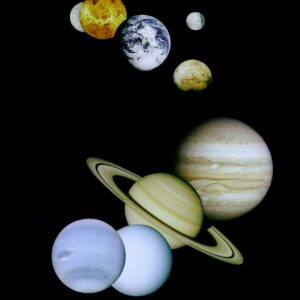
If you’re like me, gazing at the stars isn’t just a pastime—it’s a passion. Transforming that passion into a home observatory can seem daunting, but with the right equipment, it’s entirely achievable. In this guide, I’ll break down the essentials for setting up your own stargazing sanctuary.
Whether you’re a seasoned astronomer or a starry-eyed beginner, there’s a range of equipment that can enhance your celestial viewing. Telescopes, mounts, and eyepieces are just the beginning. We’ll dive into these and more, helping you navigate the cosmos from your backyard.
Ready to take your passion to new heights? Let’s explore the key equipment you’ll need to create a home observatory that’s out of this world.
Telescope: The Window to the Stars
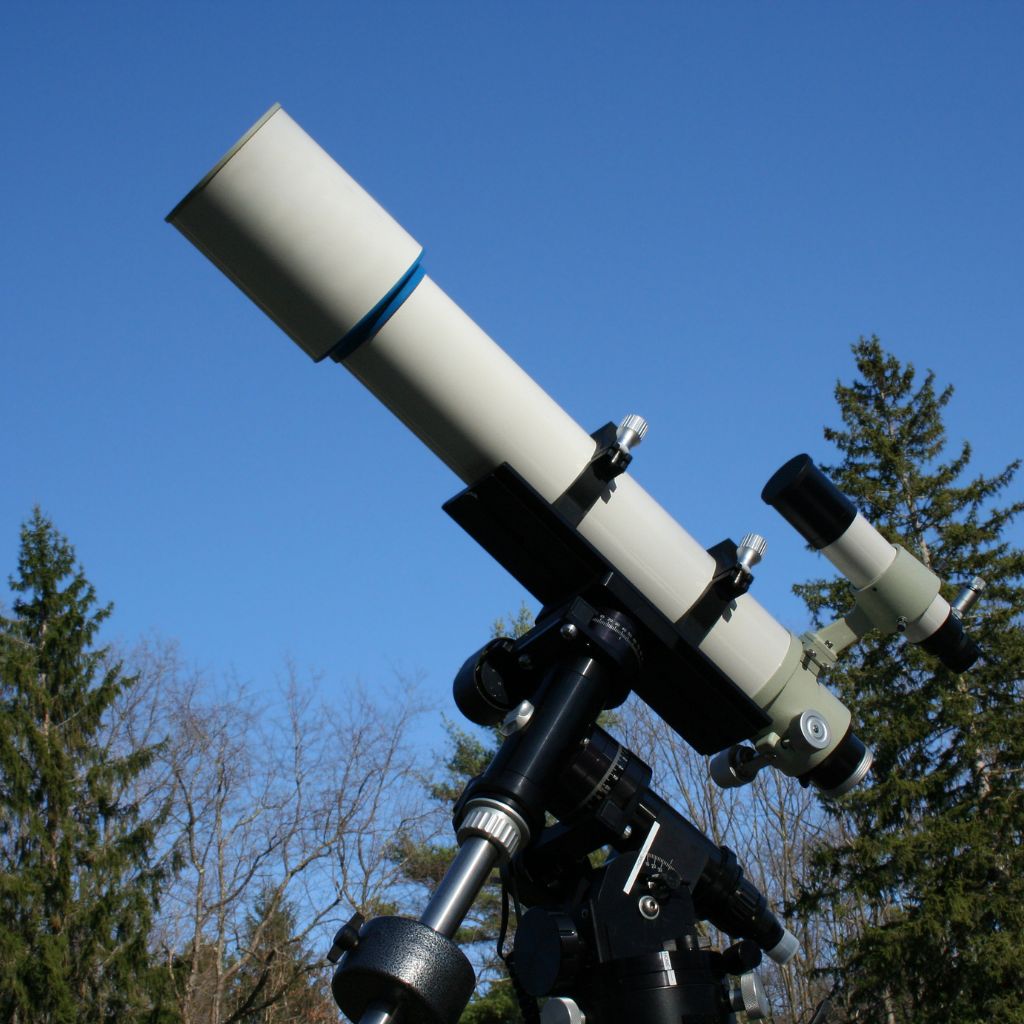
As you delve into the world of stargazing, the first piece of equipment that may spring to mind is, undoubtedly, the telescope. It’s the veritable workhorse of any home observatory, serving as your personal window to the far reaches of the universe.
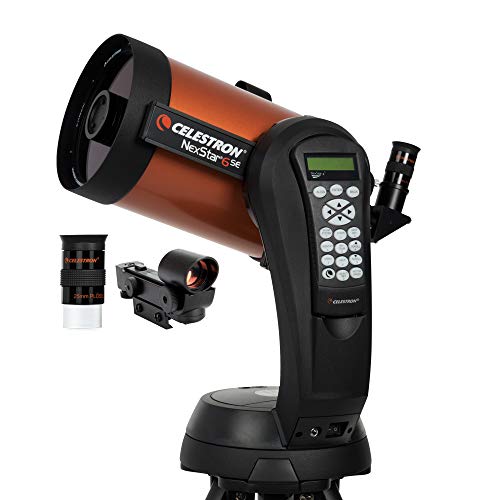
Telescopes come in a variety of types, each with their specific advantages. You’ll find three main types on the market: refractor, reflector, and compound or catadioptric telescopes. Let me break it down:
- Refractor Telescopes: The oldest type, refractor telescopes use lenses to gather and focus light, offering excellent sharpness and contrast.
- Reflector Telescopes: Rather than lenses, these utilize mirrors to collect light. With no chromatic aberration, they’re ideal for viewing faint objects.
- Compound or Catadioptric Telescopes: A hybrid of the prior two, these devices use both mirrors and lenses to minimize distortions, making them suitable for long-distance terrestrial viewing.
| Types of Telescope | Advantage | Suitable for |
|---|---|---|
| Refractor | Sharpness and Contrast | Celestial and Terrestrial |
| Reflector | No Chromatic Aberration | Celestial, especially faint objects |
| Compound/Catadioptric | Minimal Distortions | Long-distance, terrestrial & celestial |
Choosing the right telescope mostly depends on your personal needs and interests. If you’re keen on observing planets and moon details, a refractor might be ideal. However, if you’re more interested in faint galaxies and nebulae, a reflector would better suit your endeavors.
Keep in mind that no matter the type, it’s the aperture – the diameter of the lens or mirror – that dictates the telescope’s light-gathering capability. Larger apertures allow for better, clearer views of distant celestial bodies, so don’t skimp on size if stargazing is your passion. Yet remember, a larger telescope also means more weight and potentially higher costs, so you’ll need to balance functionality with practicality.
Mounts: Stability is Key
Now that we’ve covered the crucial role telescopes play in your homemade observatory, let’s talk about something equally important – the mount. The mount is what gives your telescope stability and ease of use. It’s imperative we choose a reliable one.
There are primarily two types of mounts that are widely used – the equatorial mount and the altazimuth mount.
Equatorial mounts make tracking objects more accessible as they move in line with the rotation of the Earth. This mount is particularly suitable for astrophotography.
On the other hand, altazimuth mounts are simpler, with an up-down, left-right movement. They’re more straightforward to use but lack the tracking feature. This might make it a bit harder to follow objects across the sky. Now, you’ll need to consider your specific needs and interests when deciding which mount to opt for.
| Mount Type | Pros | Cons |
|---|---|---|
| Equatorial | Easy tracking, Great for Astrophotography | Complexity in Setup and Usage |
| Altazimuth | Simple to Use | Challenging for Target Tracking |
While there’s more to a mount than just its type – the material and construction come into play as well. Steel is a common choice for its solid build and durability, though it’s on the heavier side. Other materials offer a decent balance between weight and sturdiness.
Furthermore, it’s essential to consider other aspects like the mount’s ease of assembly and disassembly, compatibility with your chosen telescope, and additional features such as computerized controls, which can make your stargazing experience incredibly straightforward and enjoyable.
So, in focusing on selecting the best telescope for your home observatory. Don’t overlook the significance of a sturdy, practical mount for whatever size and type of telescope you choose.

Eyepieces: Enhancing Your Viewing Experience
Now that we’ve discussed telescopes and mounts in great detail, let’s shift our focus to another crucial piece of equipment for your home observatory: eyepieces. Much like a camera lens, eyepieces play a significant role in determining the quality of your stargazing experience. They’re the unsung heroes that can make or break your night sky observations.
What is it that eyepieces really do? They’re designed to magnify the light collected by your telescope and bring the image into focus. Different eyepieces can bring celestial bodies closer, reveal intricate details, or provide a wide field of view. But remember: more magnification isn’t always better. Fine details can often be lost when casting a wider net in the vast ocean of stars.
You’ll often hear the term ‘focal length’ when talking about eyepieces. It’s a vital factor in determining the eyepiece’s magnification. Let’s get into the specifics:
| Eyepiece | Focal Length (mm) | Magnification |
|---|---|---|
| Wide-field | 40 | Low |
| Standard | 25 | Medium |
| High-Power | 10 | High |
A rule of thumb is to choose an eyepiece with a focal length that won’t magnify the image beyond the limits of your telescope’s aperture.
There’s a vast sea of eyepiece types out there – Kellner, Plossl, Orthoscopic, and the list goes on. While exploring these different types, keep in mind that not all eyepieces are created equal. The type and quality of the glass, the lens coating, and the construction can impact the image quality and your overall viewing experience.
Take your time in selecting the right eyepieces for your home observatory, understanding that it requires a fine balancing act between magnification needs, budget, and telescope compatibility. It’s a critical step in ensuring your stargazing adventures are truly out of this world!
Moving on from eyepieces, in the subsequent section of our article, we’ll dive into how other accessories can further enhance your celestial exploration.
Cameras: Capturing the Cosmos
As a seasoned stargazer, I’ll let you in on a secret: A well-chosen camera can be the cornerstone of a superior stargazing encounter. This piece of equipment is crucial, as it helps you record and commemorate your explorations of the cosmic realm.
The world of astrophotography is wide and varied, offering a range of cameras designed explicitly for stargazing. With choices ranging from DSLR cameras to dedicated astronomy cameras, it’s essential to select the one that best suits your specific needs and preferences.
Digital Single-Lens Reflex Cameras (DSLRs)
DSLRs are a commendable choice for beginners due to their versatility and user-friendly nature. Whether you’re capturing wide-field landscapes of the night sky or close-up shots of celestial bodies, they’re up to the task. They offer full control over exposure, ISO settings, and focus, giving you the liberty to experiment. Always remember that the DSLR’s zoom capability is reliant on the telescope’s aperture, and over zooming can lead to pixelated images.
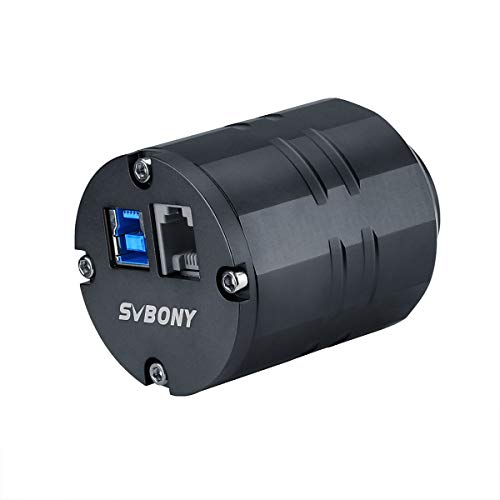
Dedicated Astronomy Cameras
For dedicated enthusiasts and those looking to capture detailed shots of galaxies, nebulae, and other distant phenomena, specialized astrophotography cameras are worth considering. These can be cooled or uncooled and usually offer greater sensitivity and lower noise levels compared to DSLRs, leading to higher-quality images.
However, these cameras are typically more complex than DSLRs, requiring additional software for control and image processing. Consider your level of familiarity with such software, as well as the overall cost and compatibility with your existing equipment when choosing a dedicated astronomy camera.
Whichever camera type you go for, investing in accessories like filters to enhance contrast or adapters to connect the camera to your telescope can significantly improve your photography results.
Now onto the role played by software and apps in enhancing your home observatory experience.

Accessories: The Finishing Touches
Now that we’ve discussed telescopes, mounts, eyepieces, and cameras in depth, it’s time to talk about the final components of a home observatory – the accessories. Accessories are not just add-ons, but rather play a vital role in making your stargazing experience all the richer and more seamless.
First up, are telescope filters. These can greatly enhance the quality of what you’re looking at through your telescope. For example, moon filters reduce light glare while viewing the moon, making for a more detailed observation. On the other hand, solar filters allow for safe solar viewing, letting you watch solar flares and other surface events.
Next, are telescope adapters. These little utilities are simply irreplaceable when it comes to astrophotography. They make it possible to mount a camera onto the telescope, enabling high-quality sky photography.
Aside from filters and adapters, don’t underestimate the importance of cleaning kits. Telescopes are delicate instruments, and their proper cleaning and upkeep are crucial for their performance. I recommend having a lens and mirror cleaning kit handy at all times to ensure your equipment is ready for the best viewing at all times.
Finally, there’s one accessory that often slips under the radar – the observing chair. Especially if you’re planning on spending lengthy periods observing the cosmic ballet, a good chair is essential. It helps maintain comfort, thereby helping you concentrate better.
While different observers may require varying types of accessories based on their specific needs and interests, these are definitely some of the items to think about. Ultimately, the right accessories can greatly elevate your night sky experience, turning it from a hobby into a passion. Bear in mind that every piece adds up to the unique balance of functionality and enjoyment.

Conclusion: Creating Your Stellar Haven
Building your home observatory is a journey that’s both exciting and rewarding. It’s not just about buying a telescope. It’s choosing the right mount, selecting eyepieces, and cameras that suit your needs. It’s about enhancing your experience with the right accessories, from filters to observing chairs.
Remember, every piece of equipment plays a key role in your stargazing adventure. And don’t forget the software. It’s your guide to the cosmos, helping you explore the celestial world from the comfort of your backyard. So, get started on creating your stellar haven. The night sky awaits.